Written by Android Developer Yelena Belikova
At the Google I/O Conference this year, Android developers such as myself got exciting news – Kotlin would be the new supported language for development! Kotlin is a programming language that addresses a lot of issues that Java faces, and Android Studio makes it simple to start writing Kotlin code right away.
In order to gain some more experience with Kotlin, I decided to build a puzzle game called Nonograms. As I considered building out this app, I knew that it would be a great time to implement our Minimum Viable Product (MVP) and Minimum Marketable Product (MMP) processes to improve efficiency during development.
Read through my checklist and download our infographic at the bottom of the post – think of it as a cheat sheet when you’re beginning your development!
Before we get started – What is MVP and MMP?
MVP is a development tool that allows you to identify the Minimum Viable Product – which is the product that has just enough features to satisfy your early customers and provide feedback for future product development. MMP – or Minimum Marketable Product – occurs after the MVP development to achieve the product with the smallest feature set that still addresses user needs and creates the right user experience.
Or, in other words, what does my game need to be functional, as opposed to what does my game need to have for the user to have fun?
Phase 1: Creating My MVP
Here is my experience working through the MVP process for my game:
Learn Before You Leap
Discovery about the current marketplace is a critical first step when you’re developing a product. I played around with many different Nonogram-type apps from the Google Play Store in order to figure out what I was building against and what appealed to the masses.
Know Your Audience
Who is your audience and what are their needs? At first, my target audience was just myself – I thought this would be a fun game to play! However, identifying my motivations and desires to create this game led me to realize that that’s a much wider audience that would enjoy this game.
An easy way to get to know your target audience is by seeing who was playing or interacting with similar products. A quick look around the Google Play store provides insight into what similar apps, like Sudoku, Nonograms, Crosswords, and Brain Games might appeal to my audience. By putting real ideas based on their preferences in front of my audience, I was able to get meaningful feedback to filter and weigh the results.
Create a List of Must-Have Features
A list of “must-haves” versus “nice to haves” is one of the most difficult parts of this process for me! It’s hard to get perspective on what will actually be critical for your user, as opposed to yourself.
During this phase, I came up with an initial list of features that I thought were important to the gaming experience.
Adjust Initial Features Based on LOE
Also, as you’re developing, keep in mind the level of effort (LOE) vs. how much a feature is contributing to the overall user experience. As my scope started to creep up, it became important to further edit and prioritize my list based on how important the feature was to the overall experience of the app and the level of effort. By editing my features into “must-haves,” “not a total must-have, but low level of effort,” and “nice to have, but too much work” I was able to start creating the MVP!
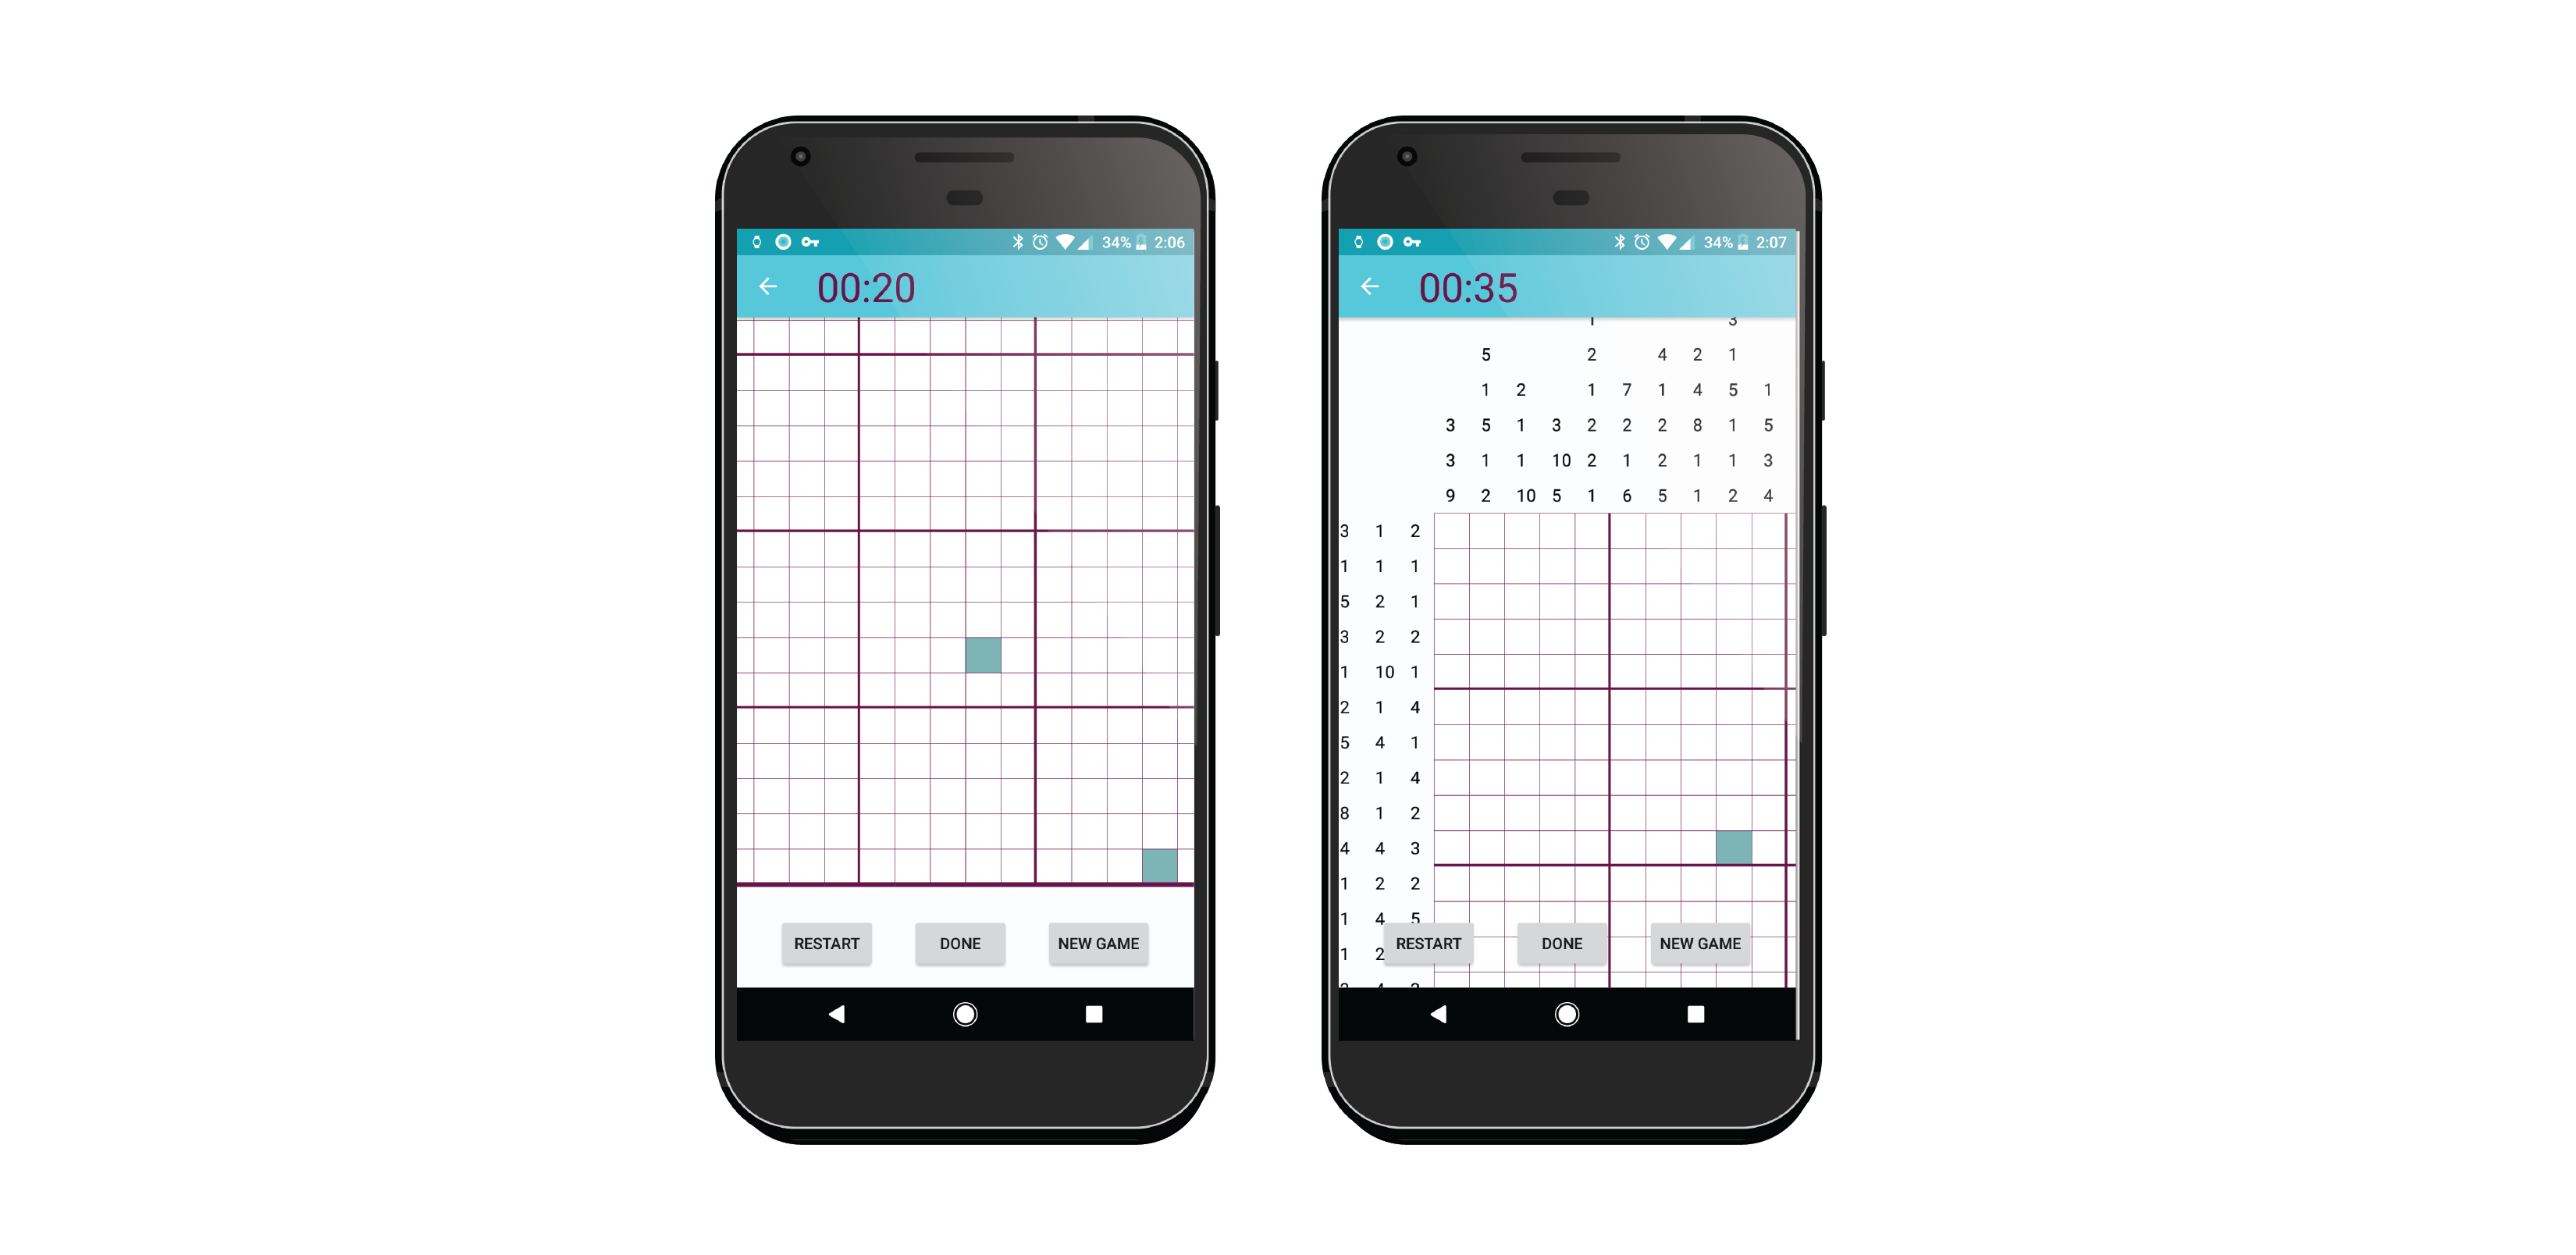 MVP screens showing minimum feature set to get early feedback
Get Measurable Feedback
With any project, you need data in order to better inform your future development. This data needs to be both qualitative and quantitative to prove product is ready for the market – in this case I wanted to know whether my game would be a usable app.
I asked around and interviewed random people within my target group in-person, and anonymously via Google Survey to decrease bias. During your process, you can also utilize Crashlytics to gather data and see where your users might have a negative experience.
Interviews allowed me to do usability testing on things like controls, ease of use, experience and intuitiveness!
Experiment, Learn, Repeat
Evolve your ideas based on the feedback! Many of my coworkers gave me feedback after playing the game, with suggestions for improvement. The number one piece of feedback I received throughout this process was the need for a tutorial screen. Since most people had not played my game before, the controls needed some explanation – and I had underestimated the need for a tutorial, assuming that the game was more intuitive. By incorporating feedback and creating different iterations of my game, most people found the game fun and entertaining to play.
Phase 2: Moving Forward With MMP
Now that I had gone through the MVP process to get a baseline of necessary features, a viable product, and some insight on my audience, it was time to move forward with the MMP process. This allowed me to achieve the product with the smallest feature set that still addresses user needs and creates the right user experience.
Analyze Your MVP Data
To reach your MMP – you need to analyze the data you gathered from your MVP. I analyzed data from multiple game iterations to figure out which features were the most critical. The easiest way to do this is by creating a list of feedback from your users in order to sort out the critical “must-have” features from the ones you can put on the backburner to potentially develop at a later stage.
Prioritizing Features, (Again!)
Prioritizing features was a never-ending game in order for me to create the right user experience. It’s important to take the user data that you’ve gathered during testing and identify the core components of your product. In other words – based on what you know your users need, what features can you market? I always prioritize features by feasibility, desirability, and viability to make sure I’m not trying to do too much – users don’t need the whole kitchen sink in order to have a good experience.
Adjust Your UX and Design
Once you have a solid list of features – you should spend some time on the design. As I spent time on my design, I kept in mind that my MMP didn’t need to have stunning visual effects. Remember, this is the minimum feature set and experience that you can market, so don’t go overboard! Keep your design simple and avoid extraneous features like sound, animations, or music.
Through design, I was able to really differentiate my game. Existing games are mostly black and white, and weren’t visually pleasing to my eye. Since most of my users reported that they play similar games to relax in their down time, I wanted the design and color scheme to be simple and gentle. We used soft colors and a lot of white space to enhance the experience.
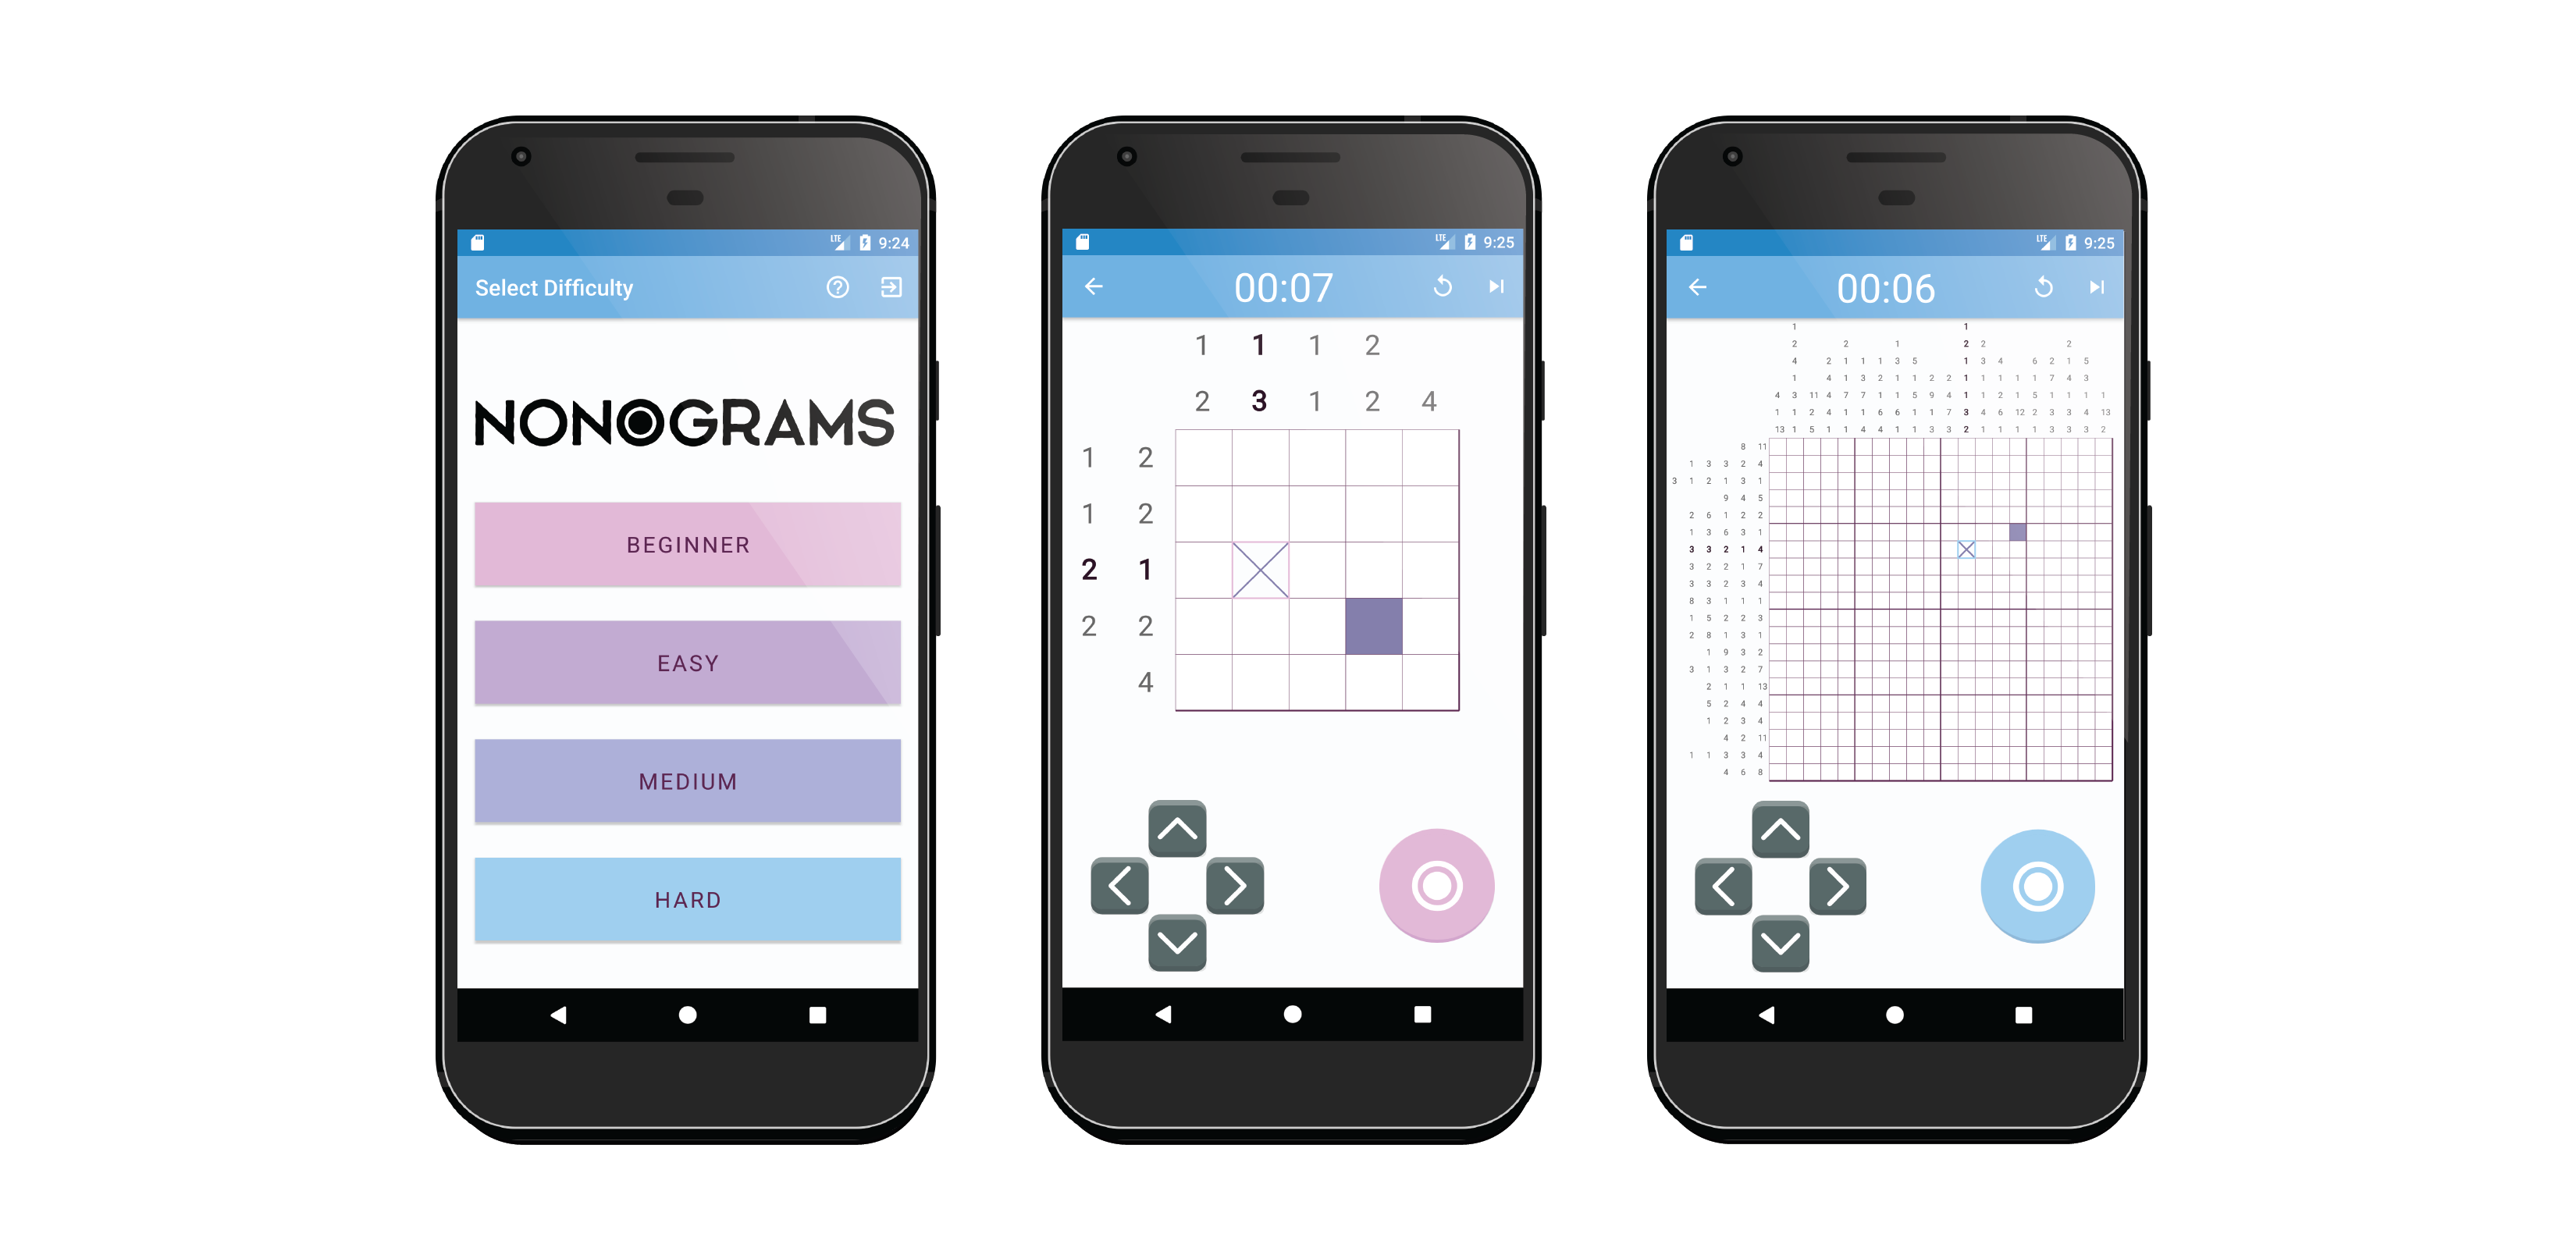
MMP screens showing smallest marketable feature set for user needs and experience
Identify Your Marketing Strategy
Our Brand Strategist and Sales team were able to identify a Marketing Strategy that would highlight the channels that resonated most with my audience, and strategize how to use them.
My team and I considered potential activities like advertising campaigns, events, paid media, sponsorships, and social media engagement. We identified the key realistic channels to promote activity around the game, and settled on web presence, email, blog, and social media engagement.
Release Your MMP 1.0!
Throughout my process, following the MVP and MMP guide definitely ensured a smoother MMP release, and kept my development in check.
This process not only allowed me to educate myself in Kotlin, but go through the MVP and MMP process – letting me launch my app faster and more efficiently while still meeting the needs of the users.
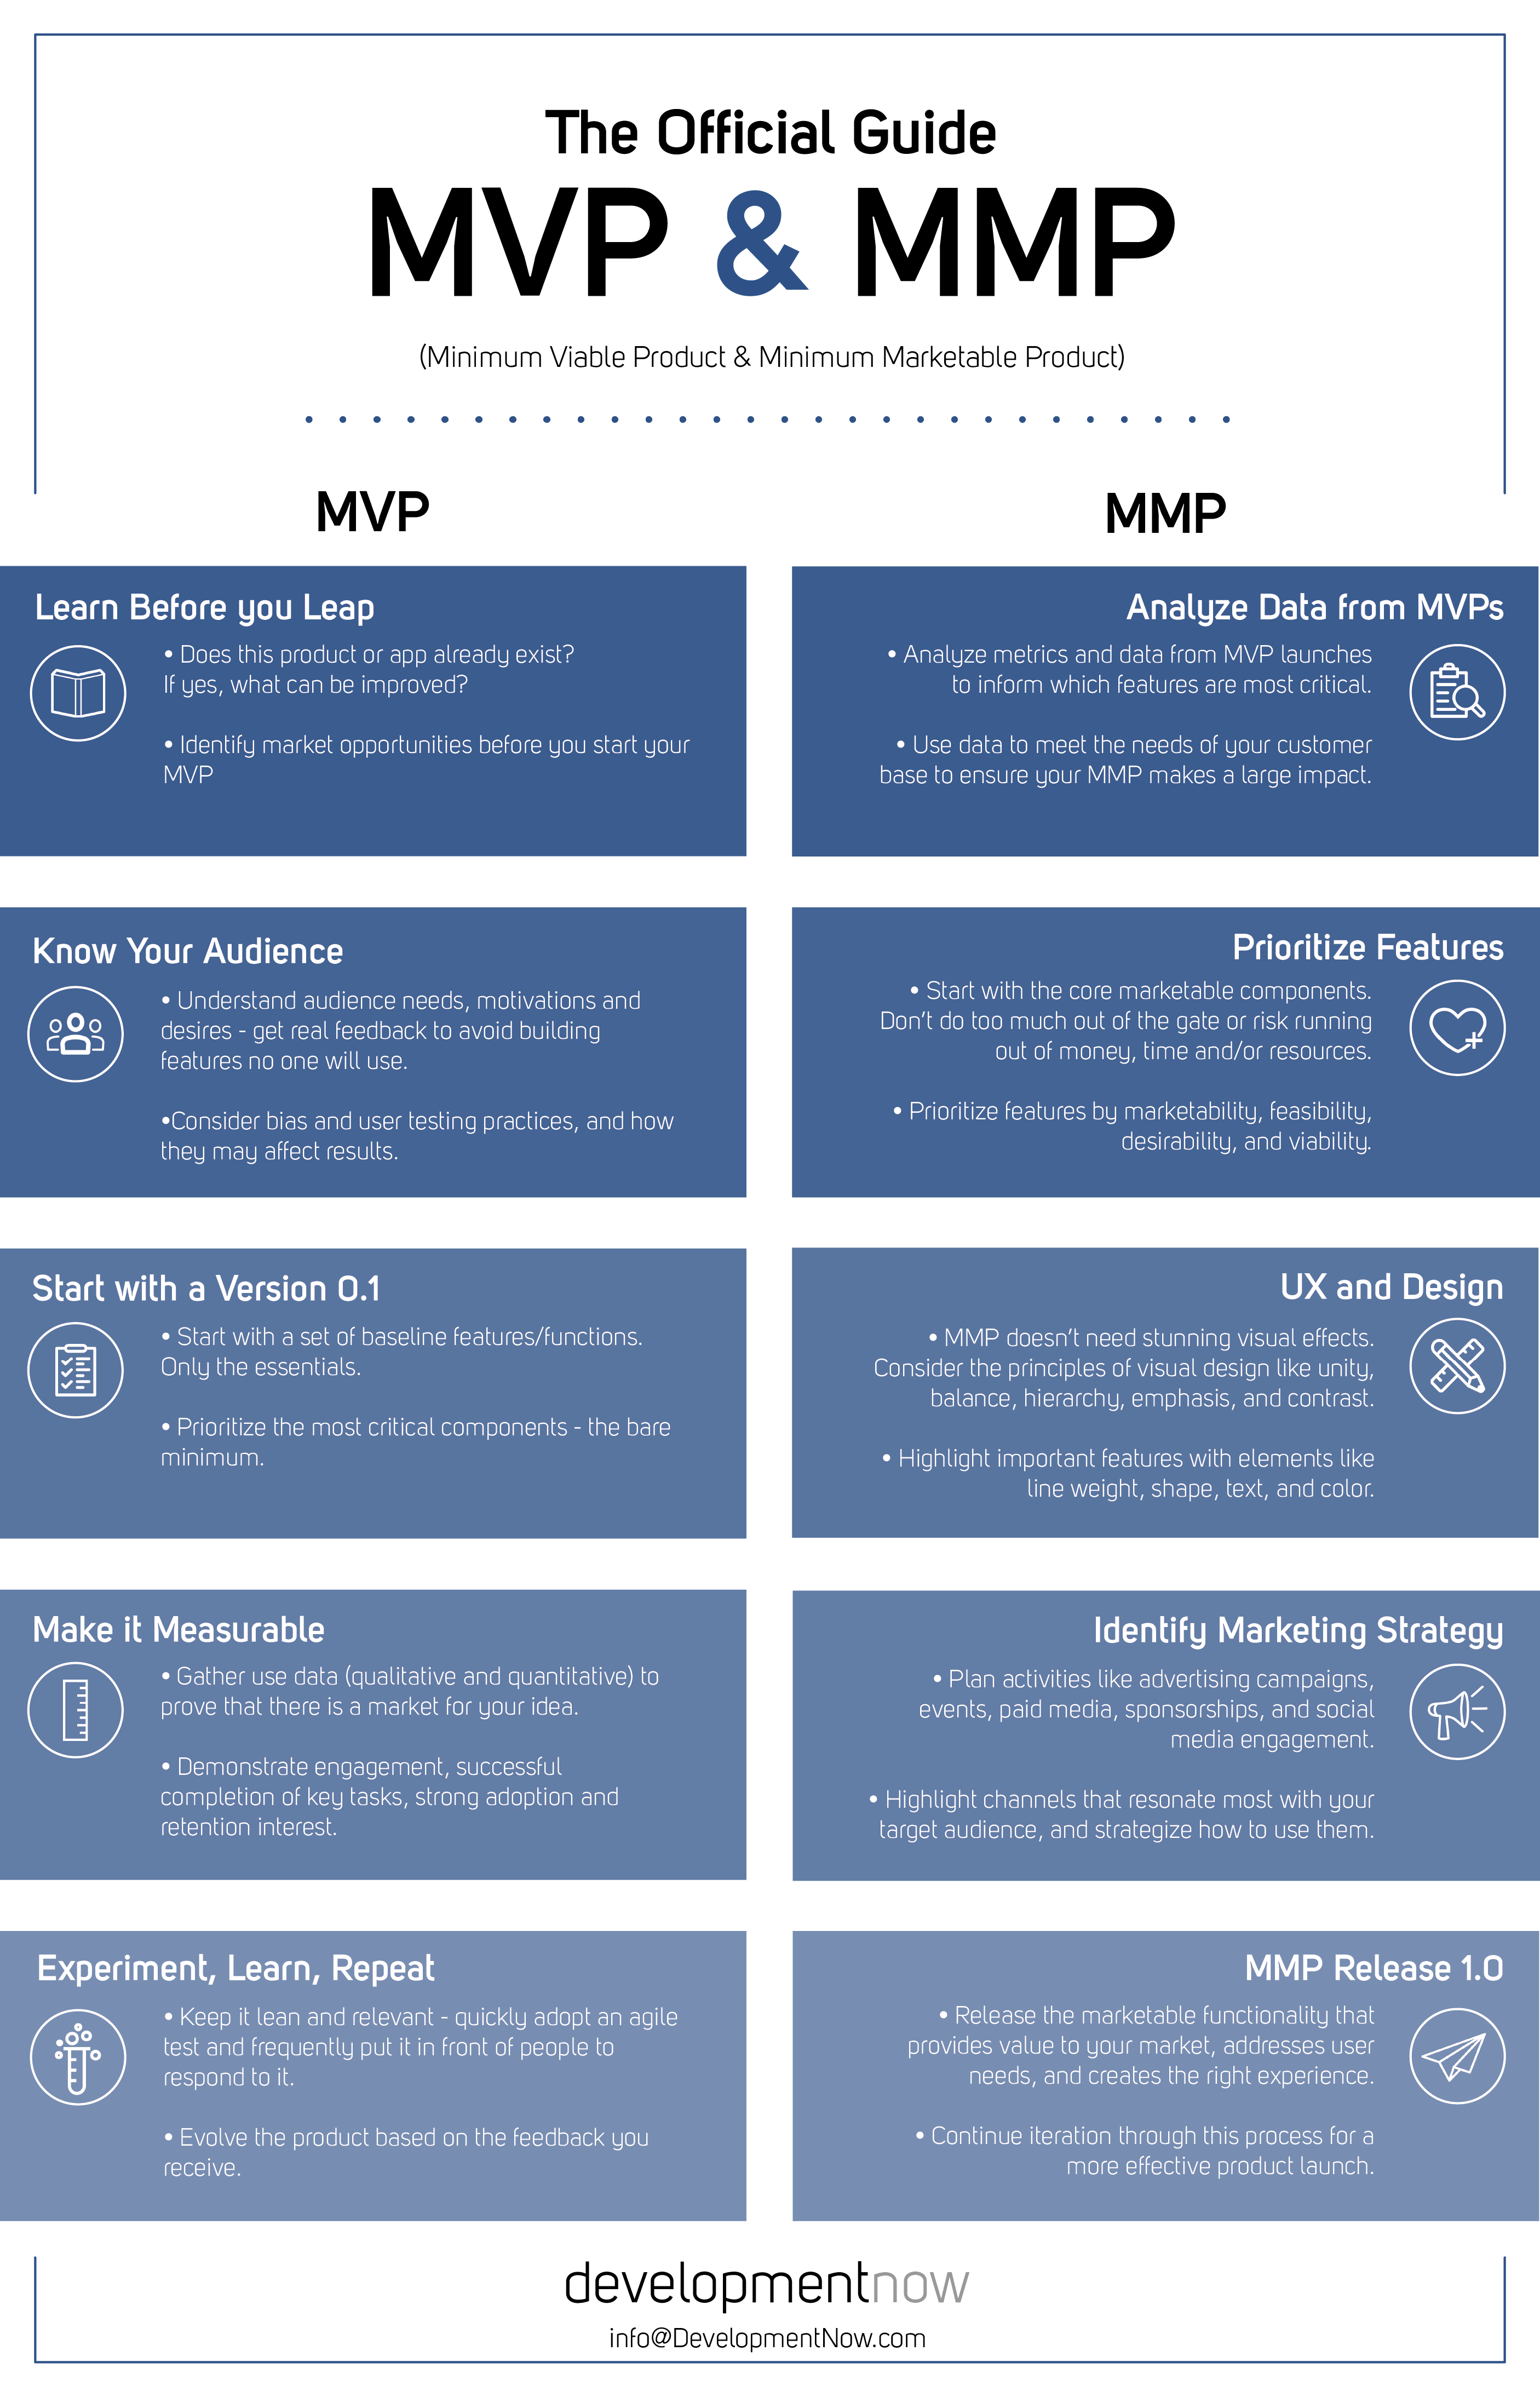
Download our infographic about the MVP and MMP processes for quick reference:
Download our infographic about the MVP and MMP processes for quick reference:
For more information on the MVP process, click here to watch our CEO Ben’s talk Optimizing Innovation: Step-by-Step to MVP.
To read more about the MVP process, click here.