Bohemian Coding’s Sketch makes producing creative assets for our projects super easy, and Zeplin allows our developers to get to these assets pain-free. What helps this production flow is ensuring our designers prep assets in their Sketch files correctly before anything goes into Zeplin, and some follow-up tasks once they’ve been uploaded. Today I’m going to walk you through how to prep your Sketch files for export into Zeplin, and how to work within Zeplin to ensure your developers can grab assets with a smile!
Editing Note: If anything changes in terms of this production flow, including new features in Sketch or Zeplin that relate to it, we’ll be coming back to this article to ensure it’s up to date. We’ve made our latest edits to this article in April 2017.
Sketch Setup
Naming Conventions
Before production in Sketch begins, designers should work with the developers to establish naming conventions for assets. A naming convention helps both teams understand how the asset system works, and makes it easier to discuss them later on. We follow conventions similar to what Ribot outlines in their Project Guide: https://github.com/ribot/android-guidelines/blob/master/project_and_code_guidelines.md
For images, we use img_name, and for icons, we use ic_name. Depending on your system, you can also include categories and subcategories for grouping purposes, such as category/subcategory/ic_cameraSelected. You can carry this over into Sketch when naming your symbols, as doing this will cause them to become grouped. In Zeplin, however, only the last part of the name (ic_cameraSelected) will be used for the rendered asset.
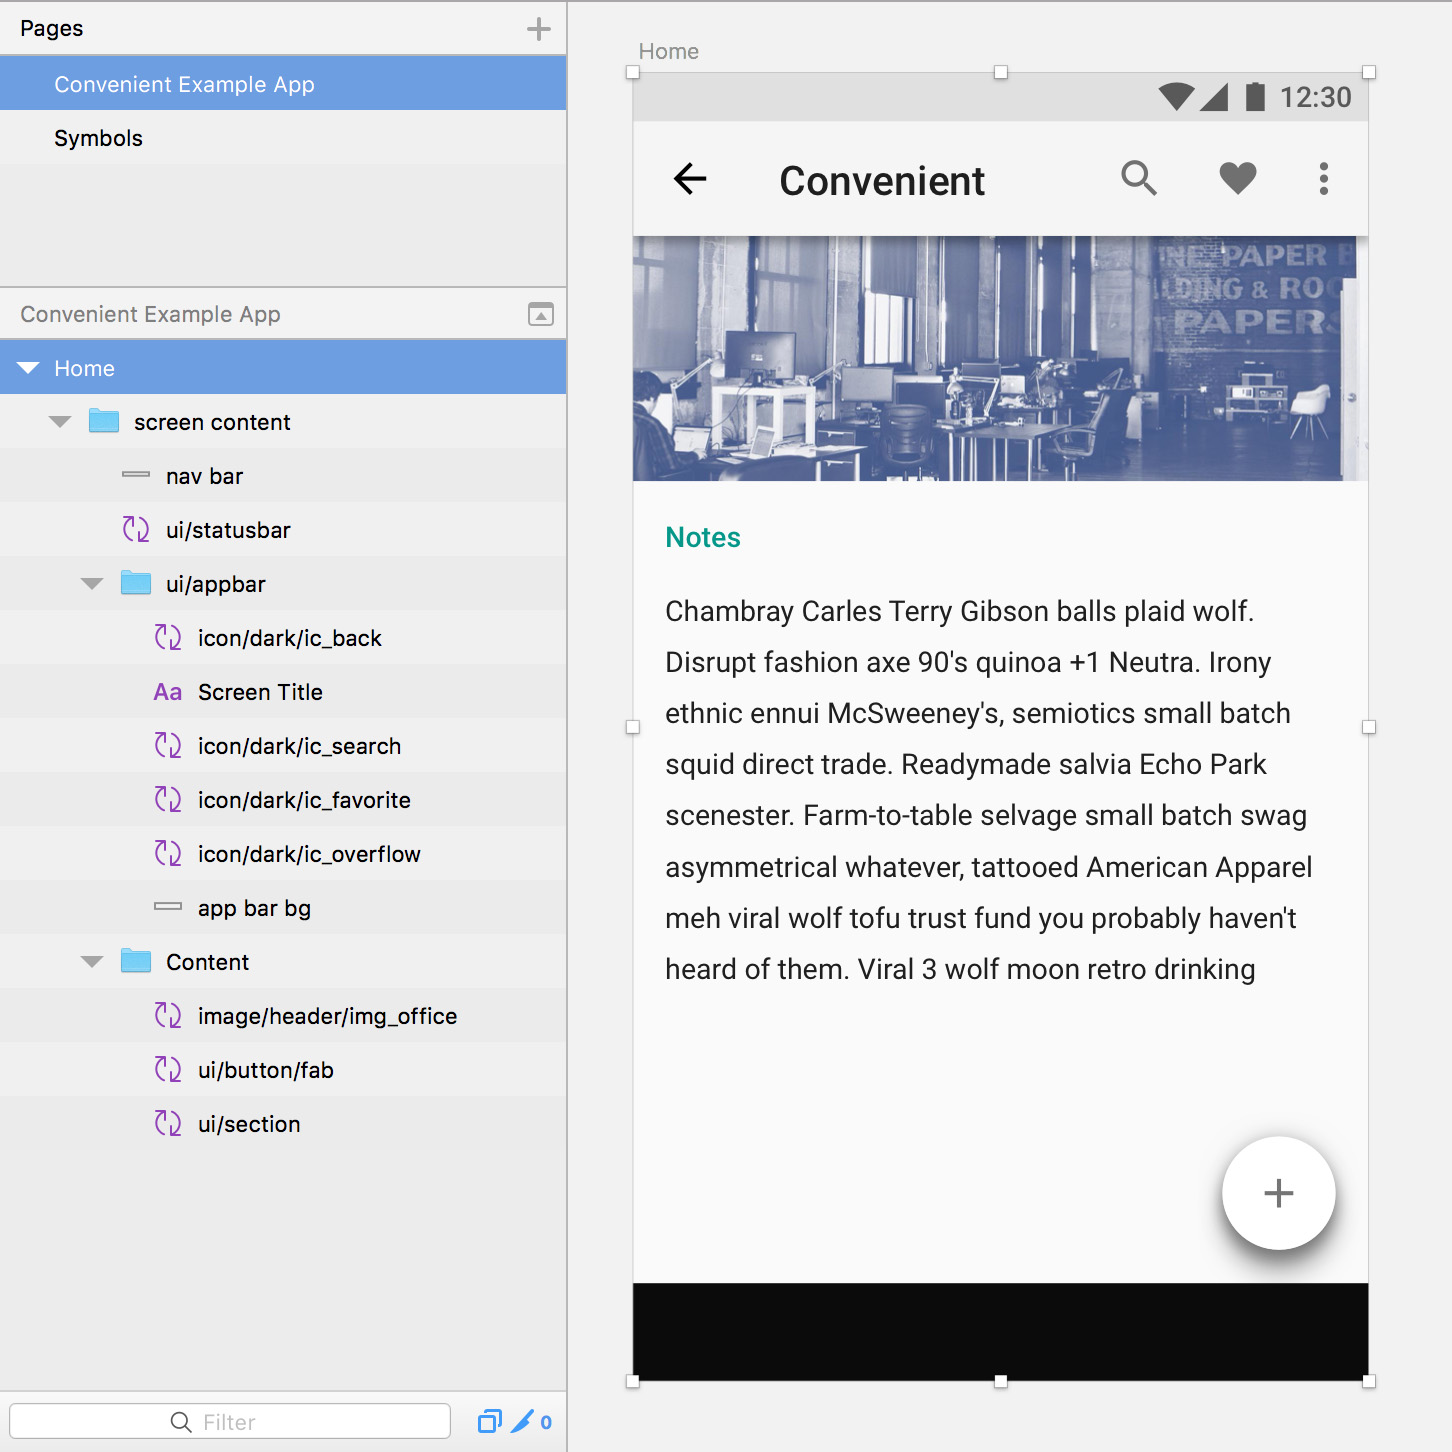 Our Sketch Layer / Asset Naming Conventions in action
Speaking of Zeplin, if you use underscores, make note that Zeplin renders the asset names differently for iOS projects. It will turn underscored names into camelCase, while Android and Web projects will retain their original underscored names. Don’t worry on this, as that’s the preferred naming standard for iOS. Finally, avoid ALL CAPS – Zeplin always converts letters into lowercase and may add additional underscores between each letter when they’re converted.
Quick Edit: Zeplin now allows developers to change the naming format of assets! You can either use the default convention Zeplin applies, the original format set from Sketch, or your favorite case type (camel, snake, or kebab)!https://twitter.com/zeplin_io/status/855080872327991297
Symbols Setup
Using symbols in Sketch is a good rule overall, as it will make things easier when preparing your assets for Zeplin. Symbols will need to be made exportable, via the Make Exportable button at the bottom of the right-hand panel (Inspector). However, you don’t have to go through setting multiple sizes or suffixes as you would normally. This is because Zeplin does the heavy lifting of producing the multiple sizes for assets based on the type of project you’re submitting to (Android, iOS, Web).
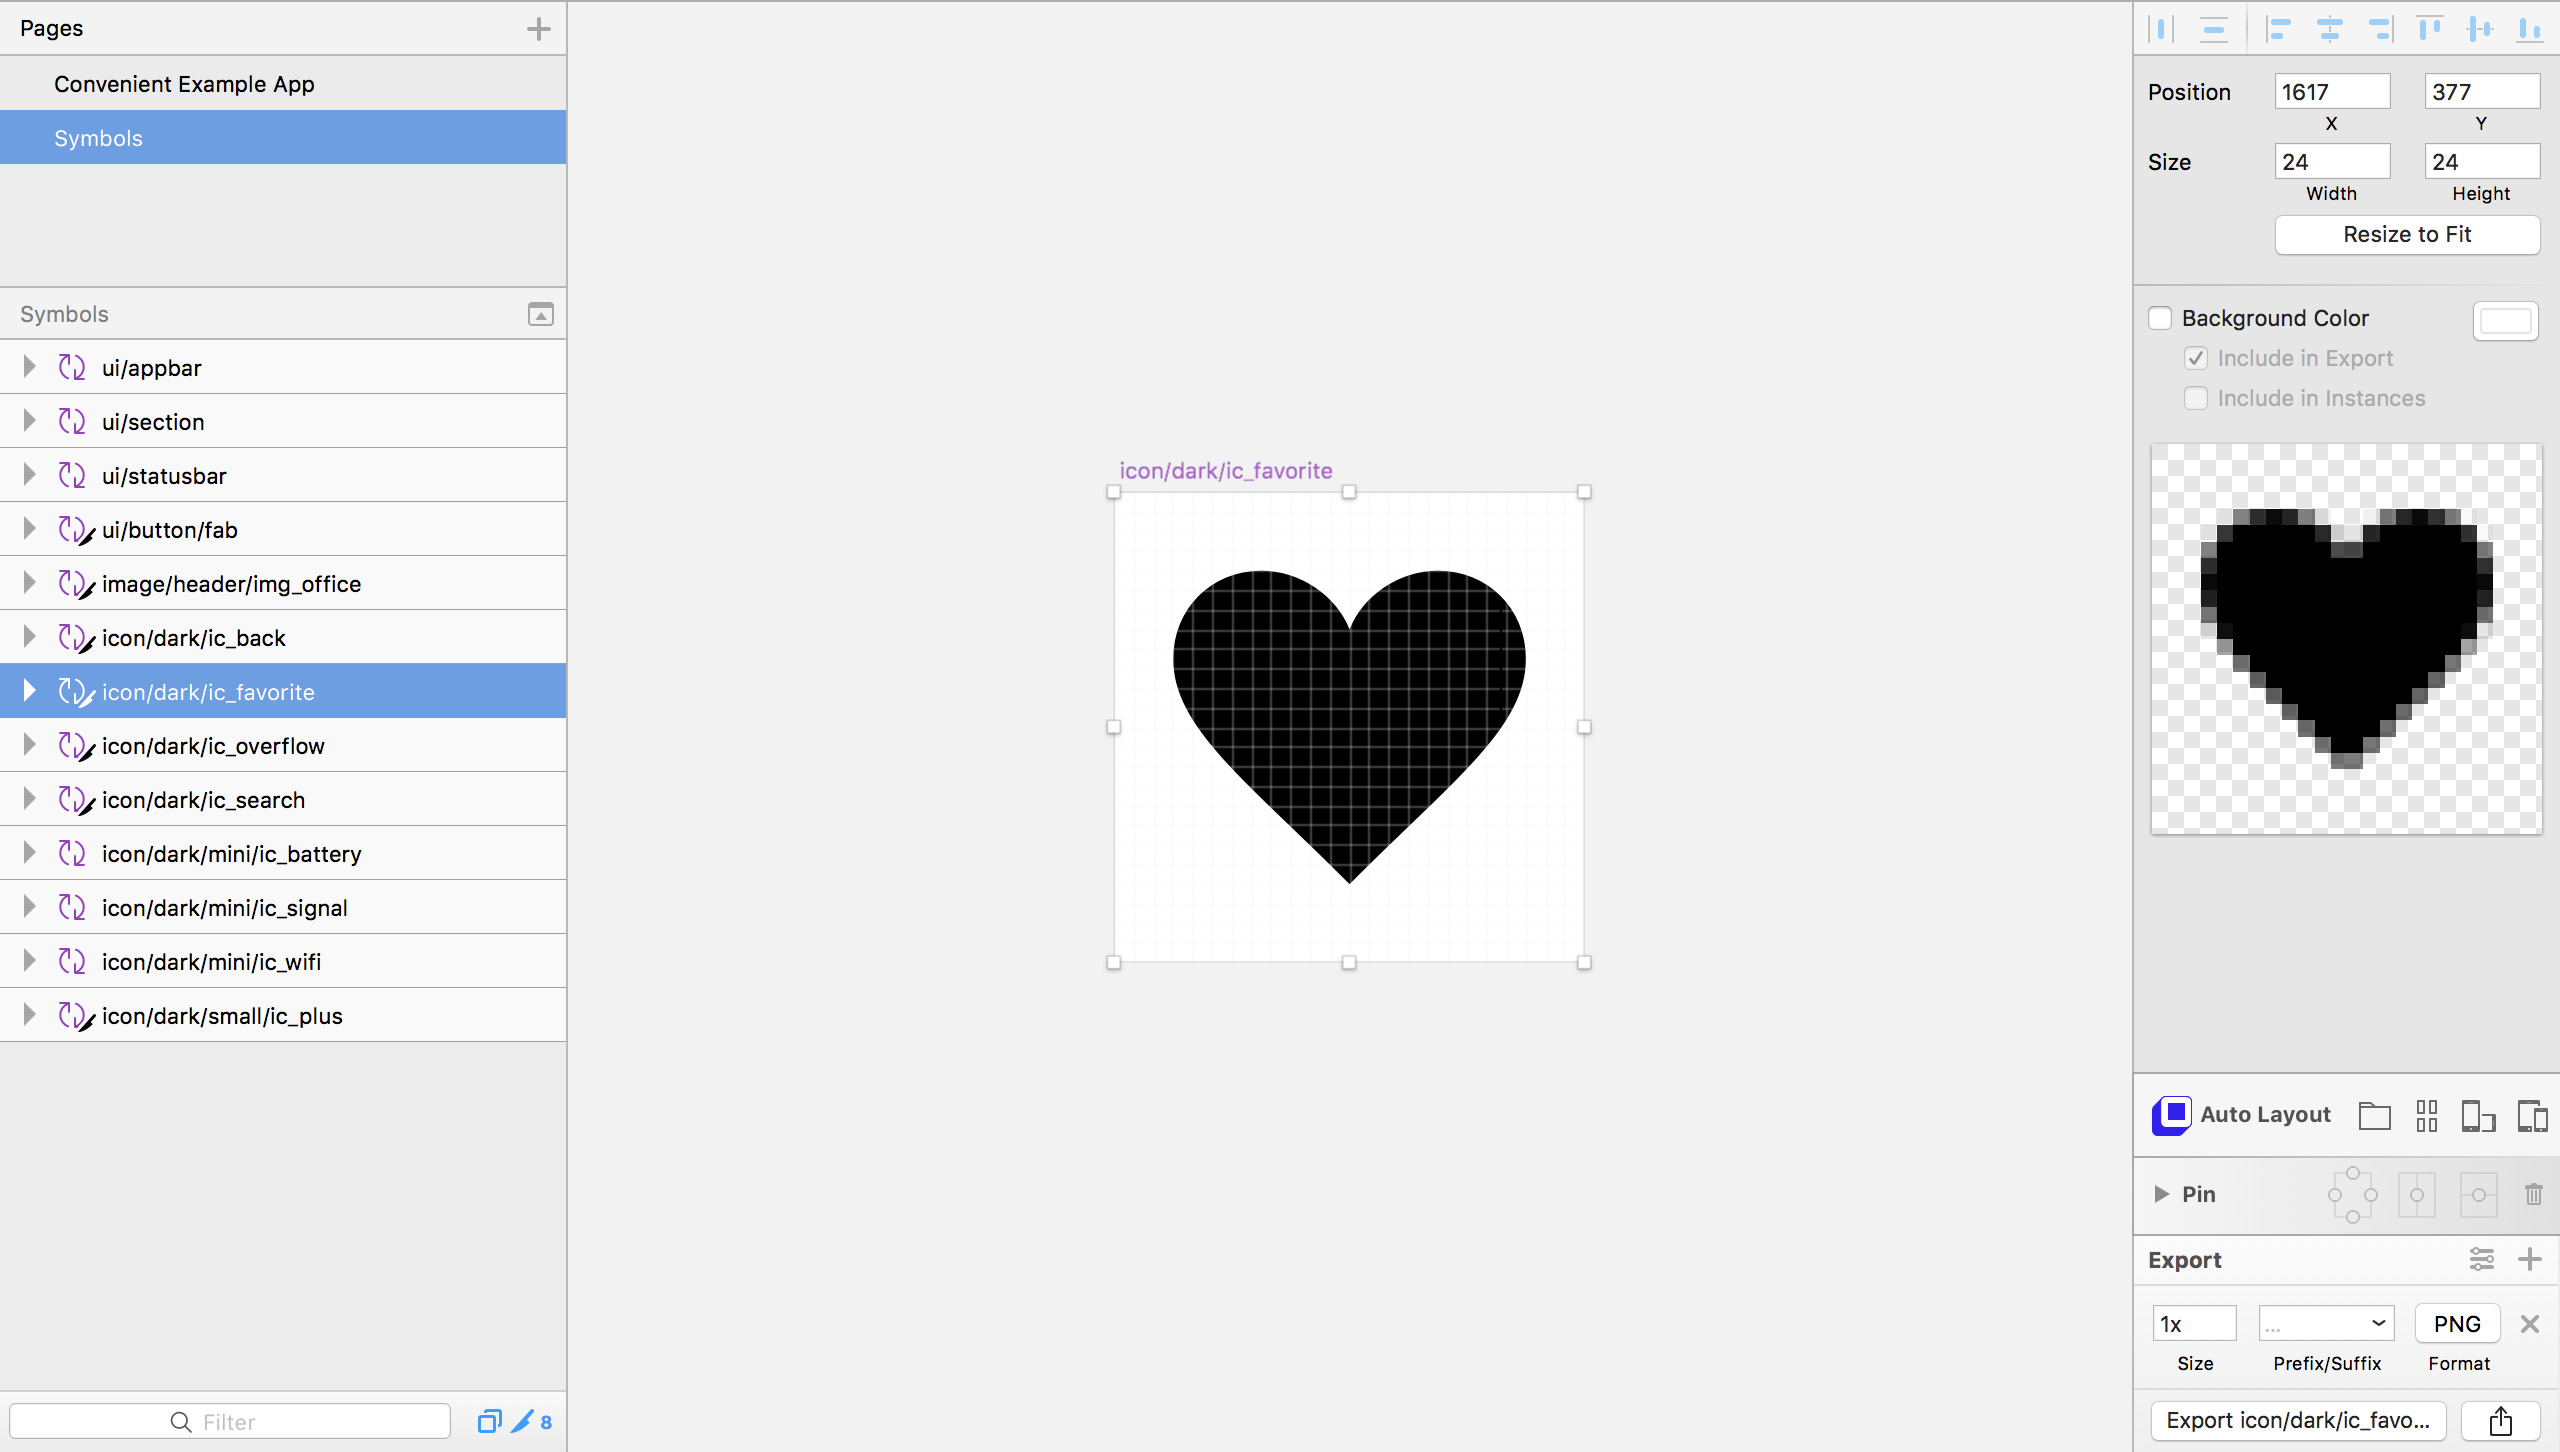 Sketch Symbols need to be made exportable for Zeplin to render them out
With this, you don’t need to make screen artboards containing symbols exportable. When you upload an artboard to Zeplin that contains symbols, it will produce assets for all nested symbols that have been made exportable within the artboard. Because symbols create themselves as an artboard within the Symbols page in Sketch, you can change the size of the symbol artboard to give the asset itself some padding. With this, Zeplin will generate the asset with a transparent background, as it uses the symbol’s artboard settings when rendering assets. If you need the asset to include the background color applied to the symbol’s artboard, you can enable the Background Color option in the Inspector.
As you make changes to your symbols via the Symbols page, they’ll apply to every instance of the symbol. This means you can make the asset exportable once from the Symbols page, and every screen artboard submitted to Zeplin that uses it will have the same settings applied, so you don’t have to repeatedly set it per screen.
If you create a parent symbol that allows for overrides of text or nested symbols, Zeplin will account for any overrides you apply to your symbols within a respective screen artboard. This makes it really easy to create a symbol once and make changes to it as you go from screen mock to screen mock.
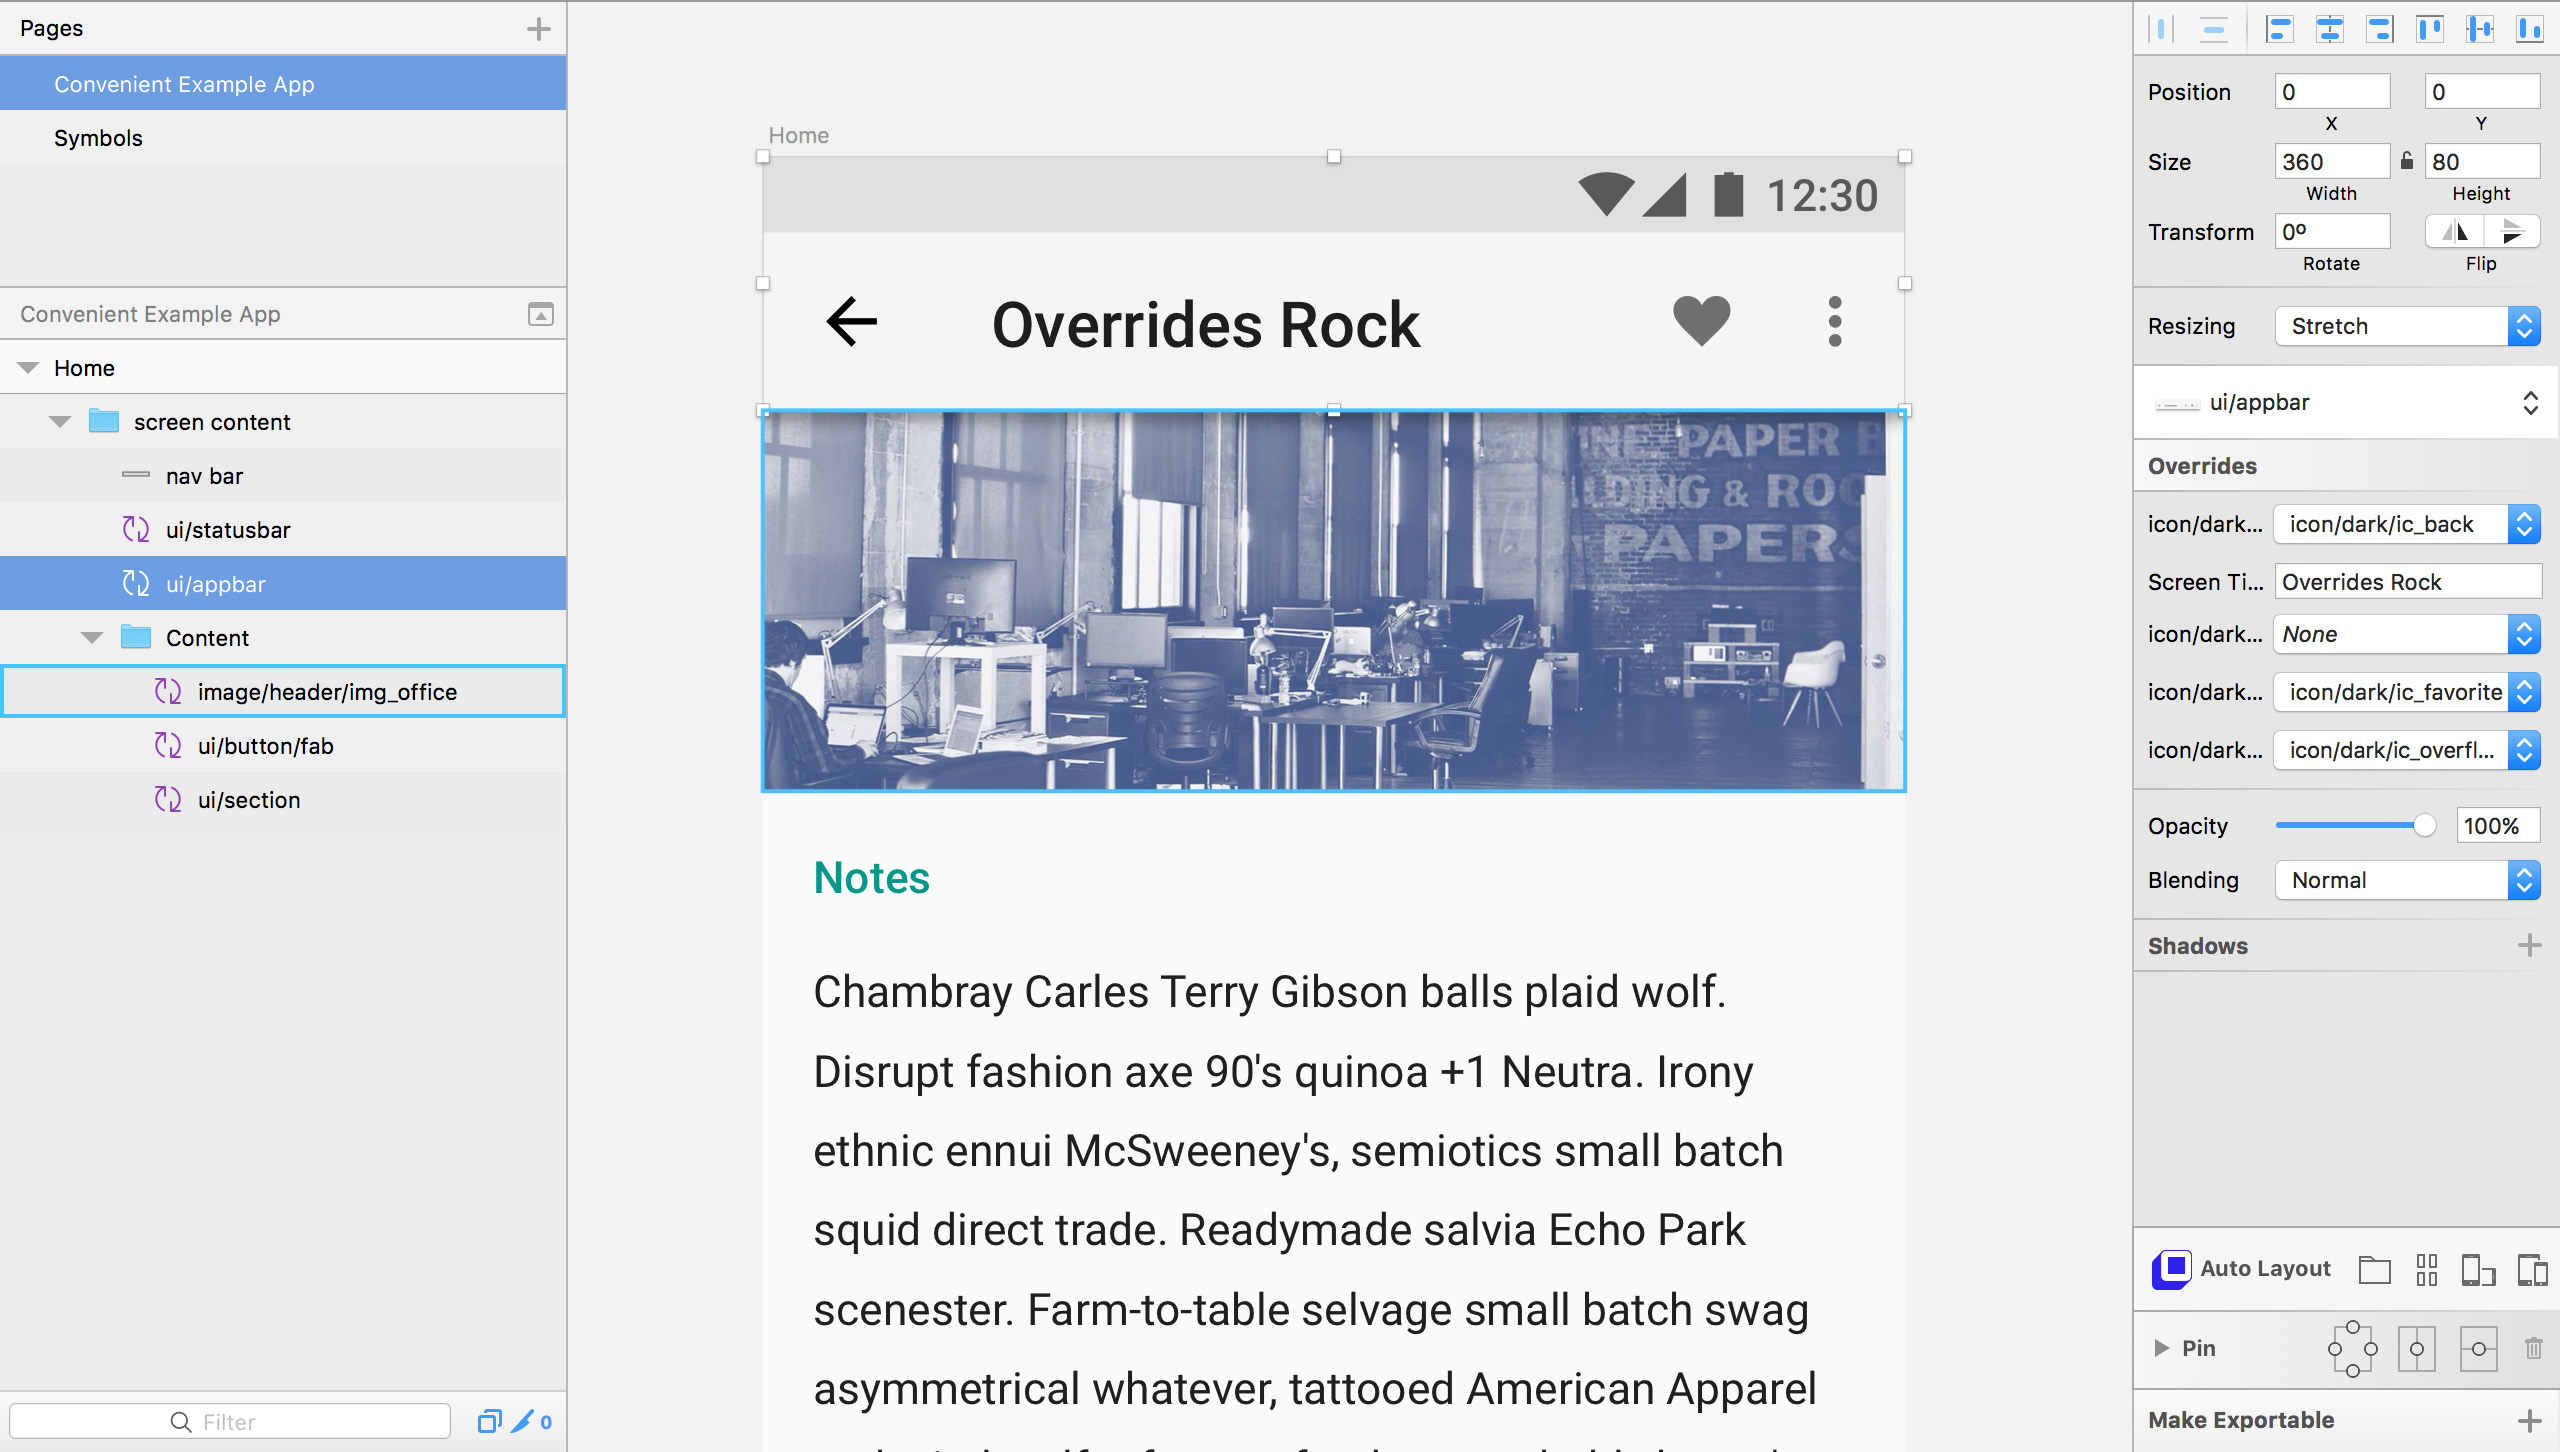 Honestly, Symbol Overrides is a major reason why I love Sketch
Zeplin Setup
Plans and Accounts
If you haven’t already created a Zeplin account, you’ll want to take note of the different plans that are available when you sign up. There’s a Free plan, which lets you get started with 1 active project. If you need more, you’ll need to archive a project in order to create a new one, or you can upgrade to either the Starter plan (3 active projects) or Growing Business plan (12 active projects). For all 3 of these plans, whenever you need to add someone to a project, they’ll need to also have a Zeplin account. People that you frequently add to other projects will show up in a convenient list when go to add people, otherwise you’ll need to use the email they signed up with first.
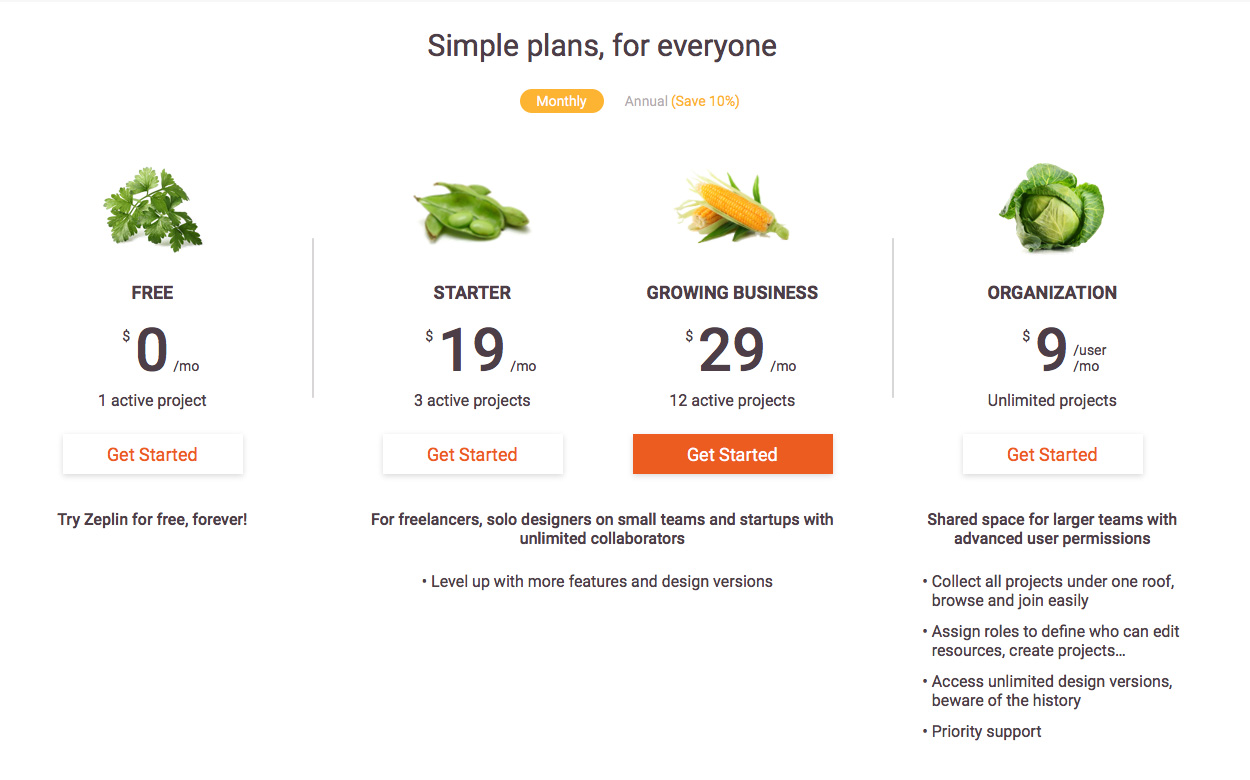 Zeplin offers all of their plans on a Monthly and Annual basis
However, this can be a hassle to manage if you’re part of a large team, especially if you have multiple people creating multiple projects, and if everyone needs to be aware every project in general. This is where the Organization plan comes in because it allows you to create a centralized account that you can group and manage people under. Its pricing is per-member, which helps in the long-run as you don’t have to have multiple people paying for Starter or Growing Business plans. Once someone is added to your Organization, if you give them an Admin or Editor role, they’ll be able to create an unlimited number of projects, and all Organization members will be able to access them.
Here are a few resources directly from Zeplin that talk more about Organization plans:
General Information: https://support.zeplin.io/pricing-and-plans/organization-plan
Adding Members: https://support.zeplin.io/pricing-and-plans/organization/adding-organization-members
Organization Roles: https://support.zeplin.io/pricing-and-plans/organization/assigning-roles-to-organization-members
Zeplin Projects
When creating a new project, you’ll be asked what platform the project will be for: Web, Android, or iOS. Zeplin will generate rendered asset based on what you select, so make sure you’re matching the platform you’re importing mocks from Sketch for. Depending on if your project is multi-platform, you may end up with multiple projects, one for each platform your Sketch files conform to and how you want assets to be exported.
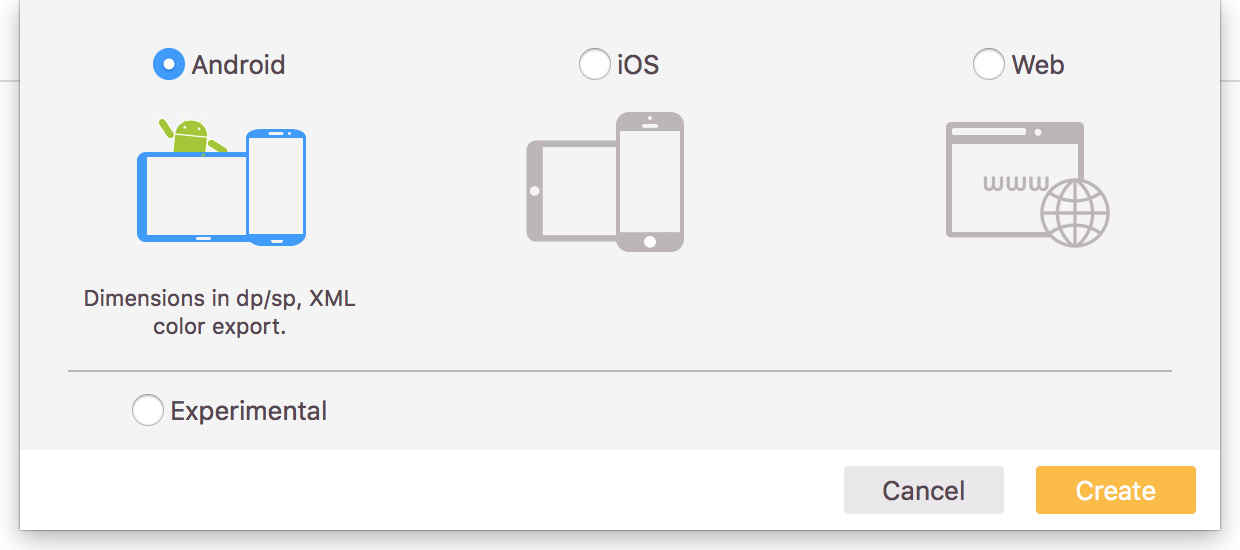 There is also the Experimental option, but currently there’s only MacOS available here
Once your project has been made, you should be taken right into the project. From here, there’s a couple things you’ll need to do to finish setting it up. The name defaults to Untitled, so you’ll need to give it a name proper. This can be whatever you’d like, but if your project is multi-platform, you may want to use a naming system like this;
- projectname Android
- projectname iOS
- projectname Web
The density defaults to unknown, and depending on the platform type, you’ll get different options for what you can set it to. This setting is very important as it’ll determine how assets exported from Zeplin are sized. Match it to the density or sizing of your mocks. With Sketch being vector-based, you can work at any size and export them easily. We usually work at a mdpi (360px) / @1x (320px – 375px) size for native apps.
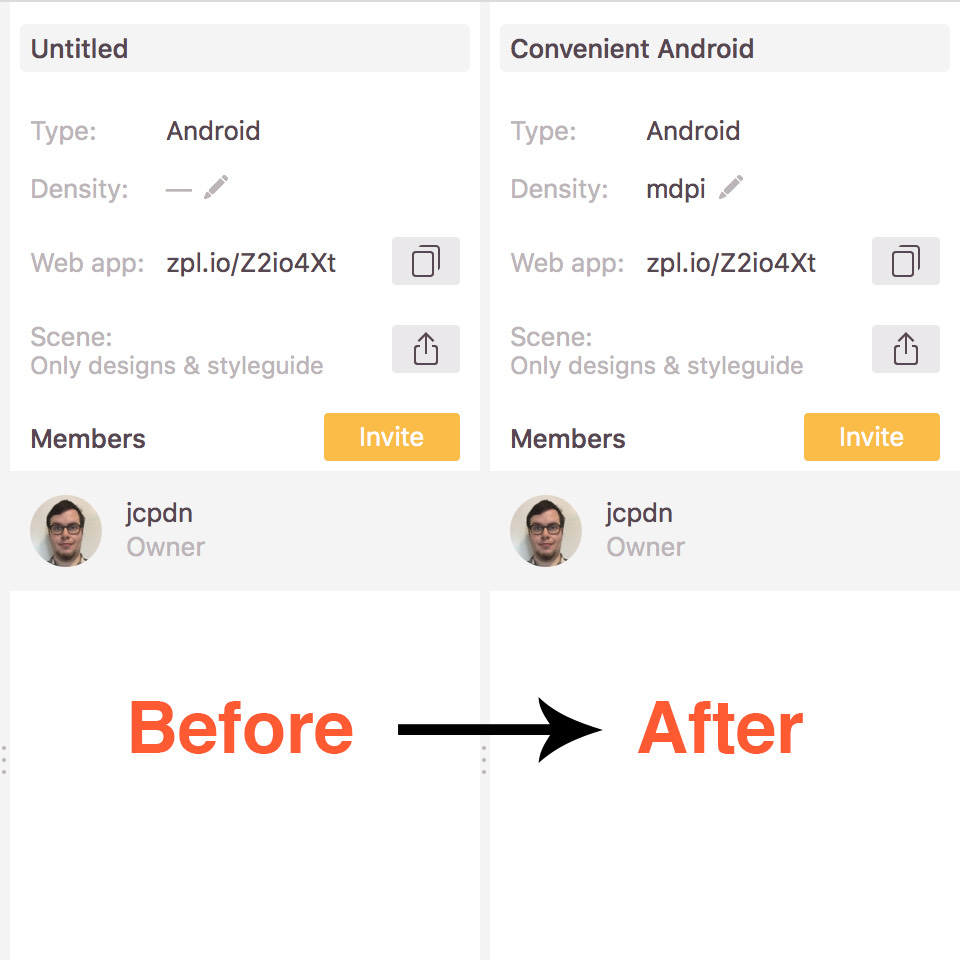 You’ll also be able to invite people to the project from this panel
Exporting from Sketch
Zeplin Plugin
A small housekeeping step to take care of first: Make sure you’ve installed the Zeplin Sketch plugin. If you’re using the Zeplin Mac app, this should be installed automatically, which you can check in Sketch under the plugins menu. If it’s not there, or you haven’t installed the Zeplin Mac app and have never installed a Sketch plugin before, this page should help you out: https://zeplin.io/support.html
Sketch Artboards
Once you’re good to go, select which artboards you want to export into your Zeplin project, either by selecting them in the Layers List or clicking on the artboard’s name in the Canvas. Shift-Clicking will let you select multiple artboards.
Next, you can either use the ⌘+E shortcut or by going into Plugins > Zeplin > Export Selected Artboards… – this will bring up a new window that displays a list of your projects. You may need to log into Zeplin from here. If you have the Zeplin Mac app installed, opened, and are logged into it, it’ll automatically display your projects.
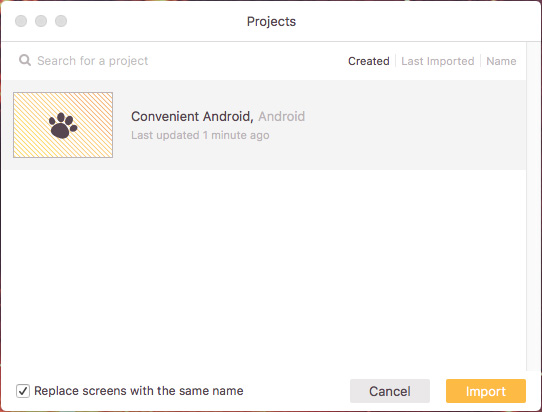 If you have a lot of projects, the plugin has a search feature to filter your projects
Select which project you want to upload to, and click Import. While it’s uploading, you can switch over to Zeplin and watch it update with your screens, otherwise you can just wait for the progress bar to fill up.
Reviewing in Zeplin
Styleguide
Once all the artboards finish uploading, head over to the project’s Styleguide tab in Zeplin. You’ll see that a bunch of suggested colors and text styles that can be added. This is based on the text styles Zeplin found from your Sketch file, and the associated colors it could find.
Once added, you can edit the names it applied to each respective color and text style; doing this helps give them variable names that developers can use as classes, and these variable names will apply to all screens uploaded to the project that Zeplin sees already using them. It’ll also check your last export for any new styles that haven’t been added to the guide!
 You’ll also be able to delete styles that developers should not be accounting for
Asset Check
Along with the Styleguide, it’s usually a good idea to the Dashboard tab so you can go through each imported screen and make sure all of the assets you expect to be exportable look right, such as the names and sizing. You can view this either by looking in the Assets tab in the right-panel (the slice/knife icon) or directly clicking on a symbol on the screen. Doing this, you can see the properties of the asset, and can directly download the files for the respective symbol.
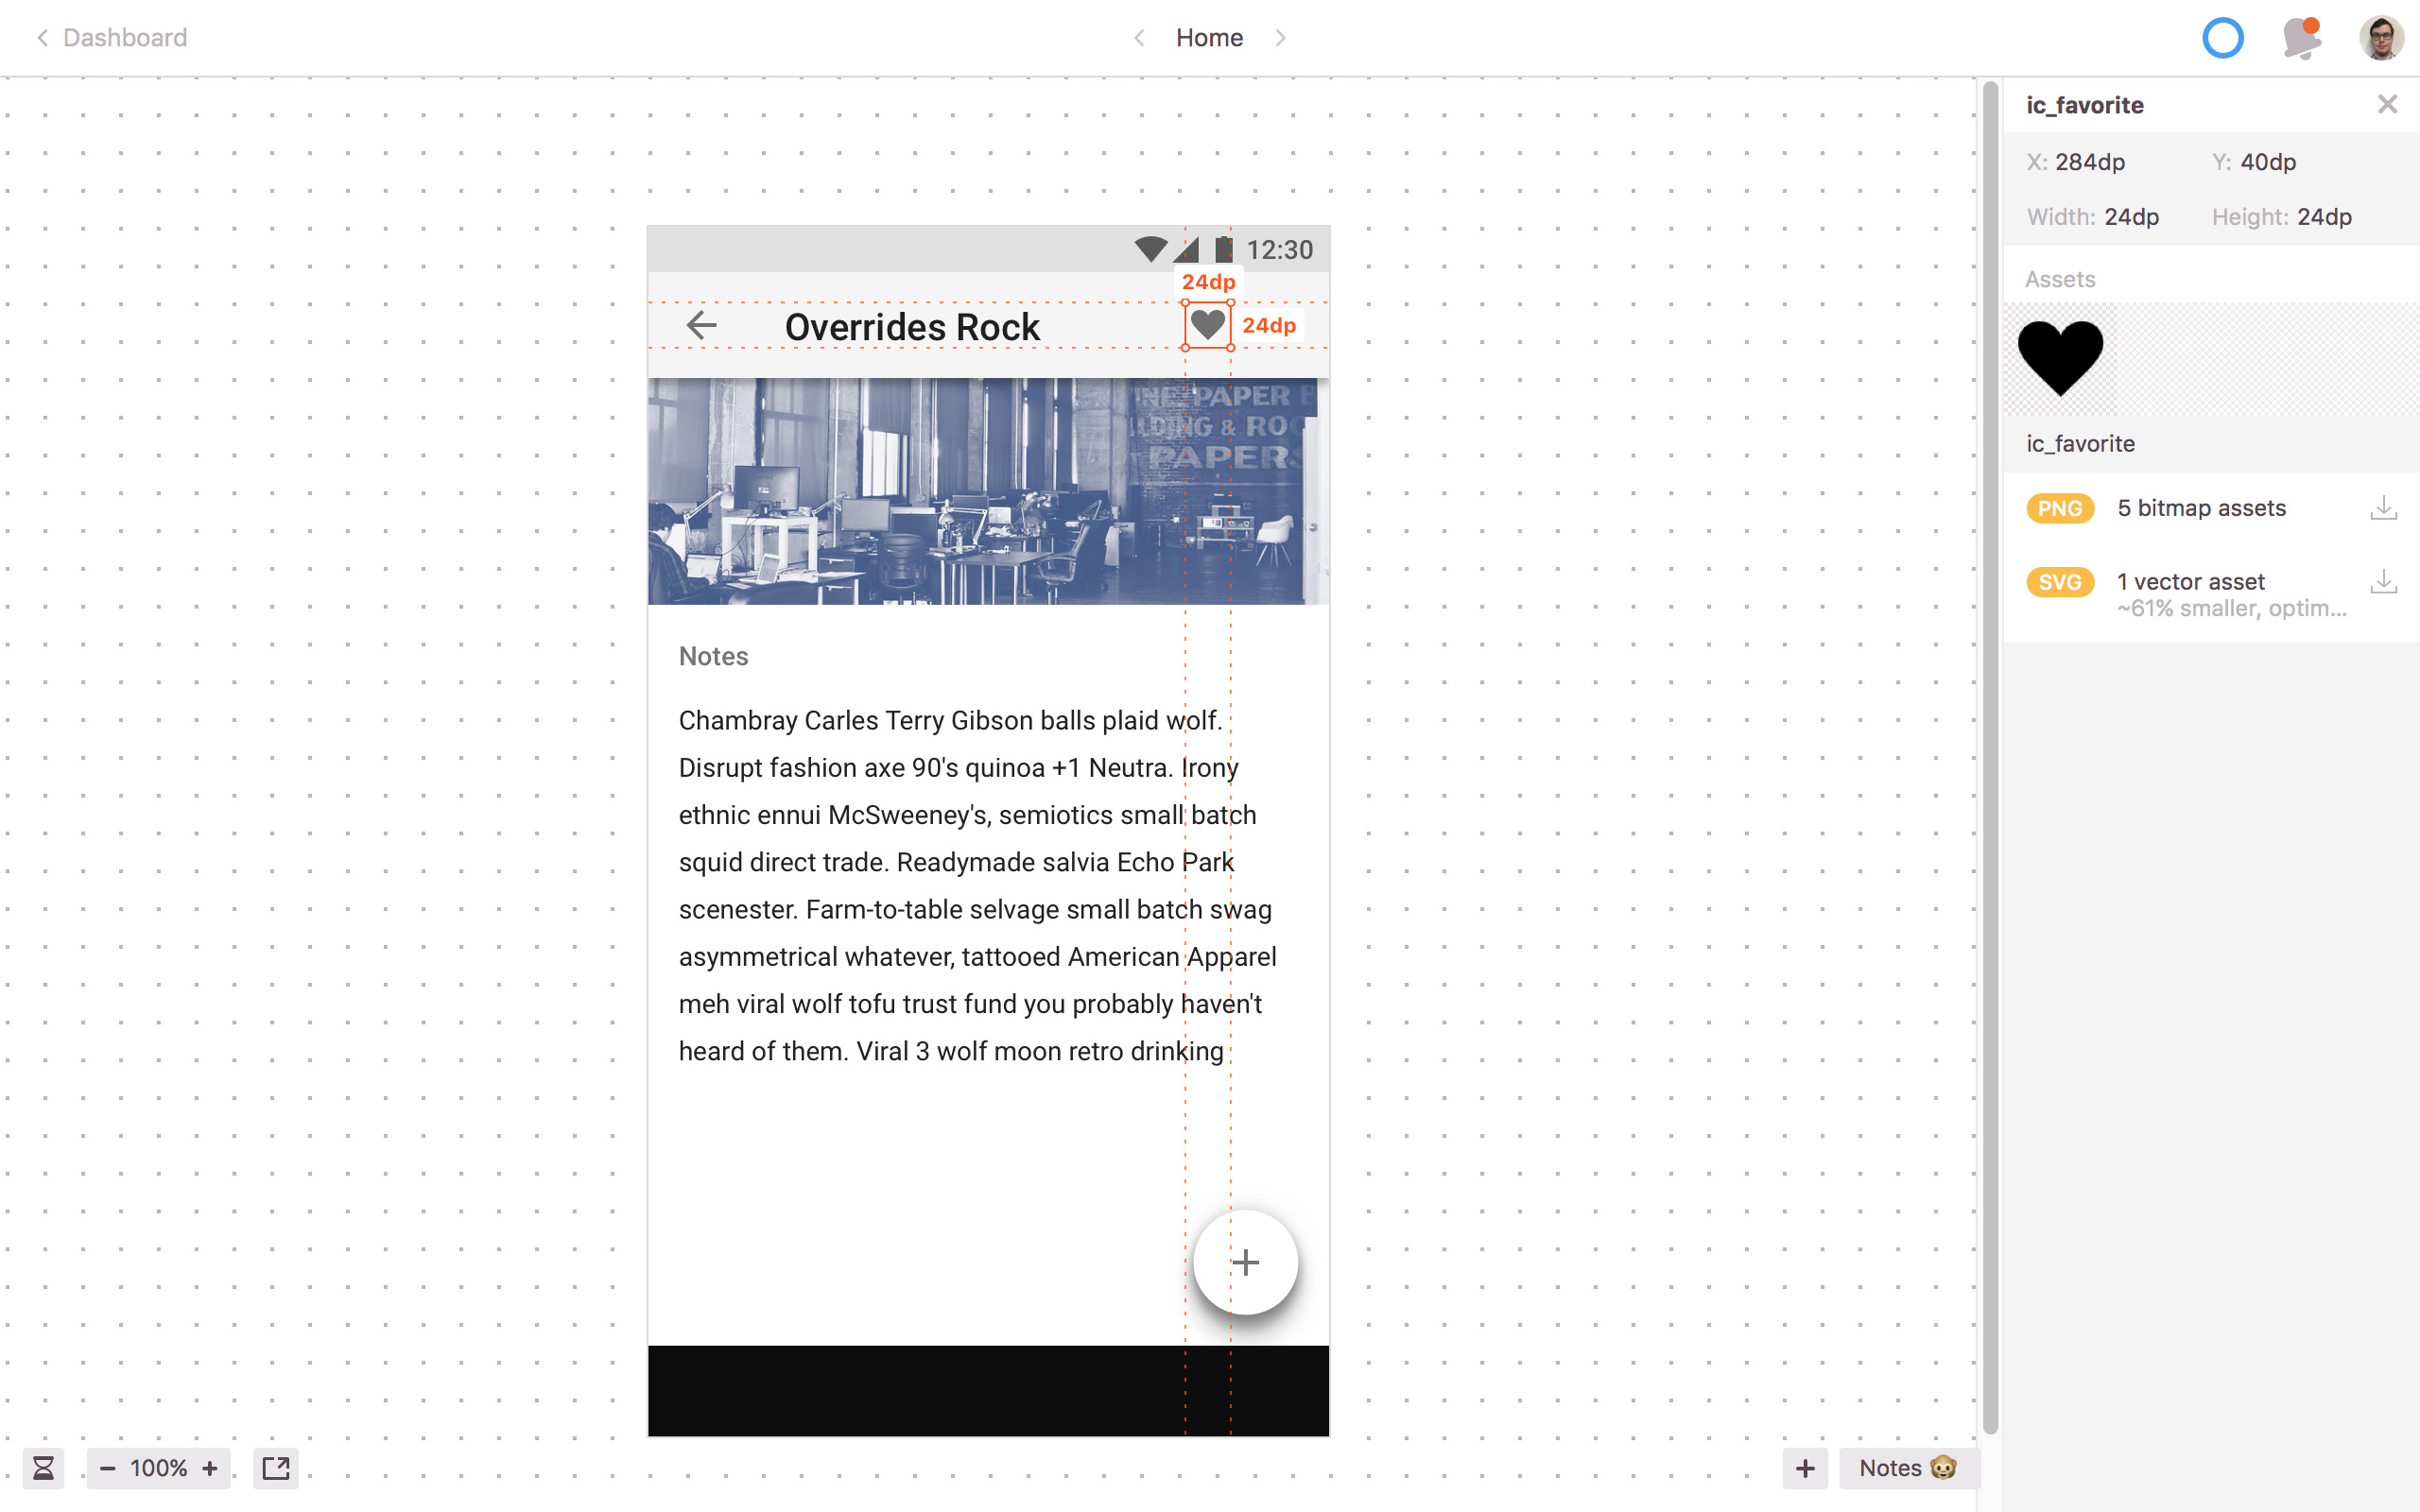 If it can, Zeplin will create an optimized SVG version of an asset it renders
You can also do this with copy. Like assets, you can click on a body of text to see its properties, such as what typeface was used, the sizing/alignment/line-height of the body, and what color it uses. If it already uses a color or text style defined in the Styleguide, it’ll show as such. Otherwise, if they weren’t defined as styles in your original Sketch file, you can add them to Styleguide – either the text style, the color, or both.
 Sizing and Line Height will change units depending on the Platform settings the Project is using
Changes, Updates, and Fixes
You can easily fix issues in Sketch and re-upload to Zeplin, but there are a few things to keep in mind. Firstly, if you make changes to a symbol or overrides on a parent symbol in Sketch, you’ll need to upload all screens that use that symbol.
Secondly, you’ll want to keep the name of the artboard the same in both Sketch and Zeplin. Otherwise, if you change it in Sketch, it will upload the artboard as a new screen in Zeplin, which will cause it to have a different URL. This can get annoying if you’ve set Zeplin to be your source of truth for scope/expectations, and have already linked to the screen elsewhere (like in a JIRA task/story). If you need to change the name, make the change in both Sketch and Zeplin, and then upload the screen to the same project. This will make sure Zeplin will apply the change as a new version to the existing screen.
Finally, on the topic of versioning, Zeplin will keep track of each upload you make to a screen, and everyone will be able to look through the past versions of a screen. This is done by clicking the little hourglass icon in the bottom left when you view a screen, which reveals the version timeline panel. As a new version is made, you’ll be able to add a note through this panel. Make sure your note details what changes actually occurred, so that everyone knows what to look for. Depending on your plan, your history may not go back to the very first upload, but you can delete visible versions. I only recommend doing this if you made a minor change that really doesn’t need a whole note on its own.
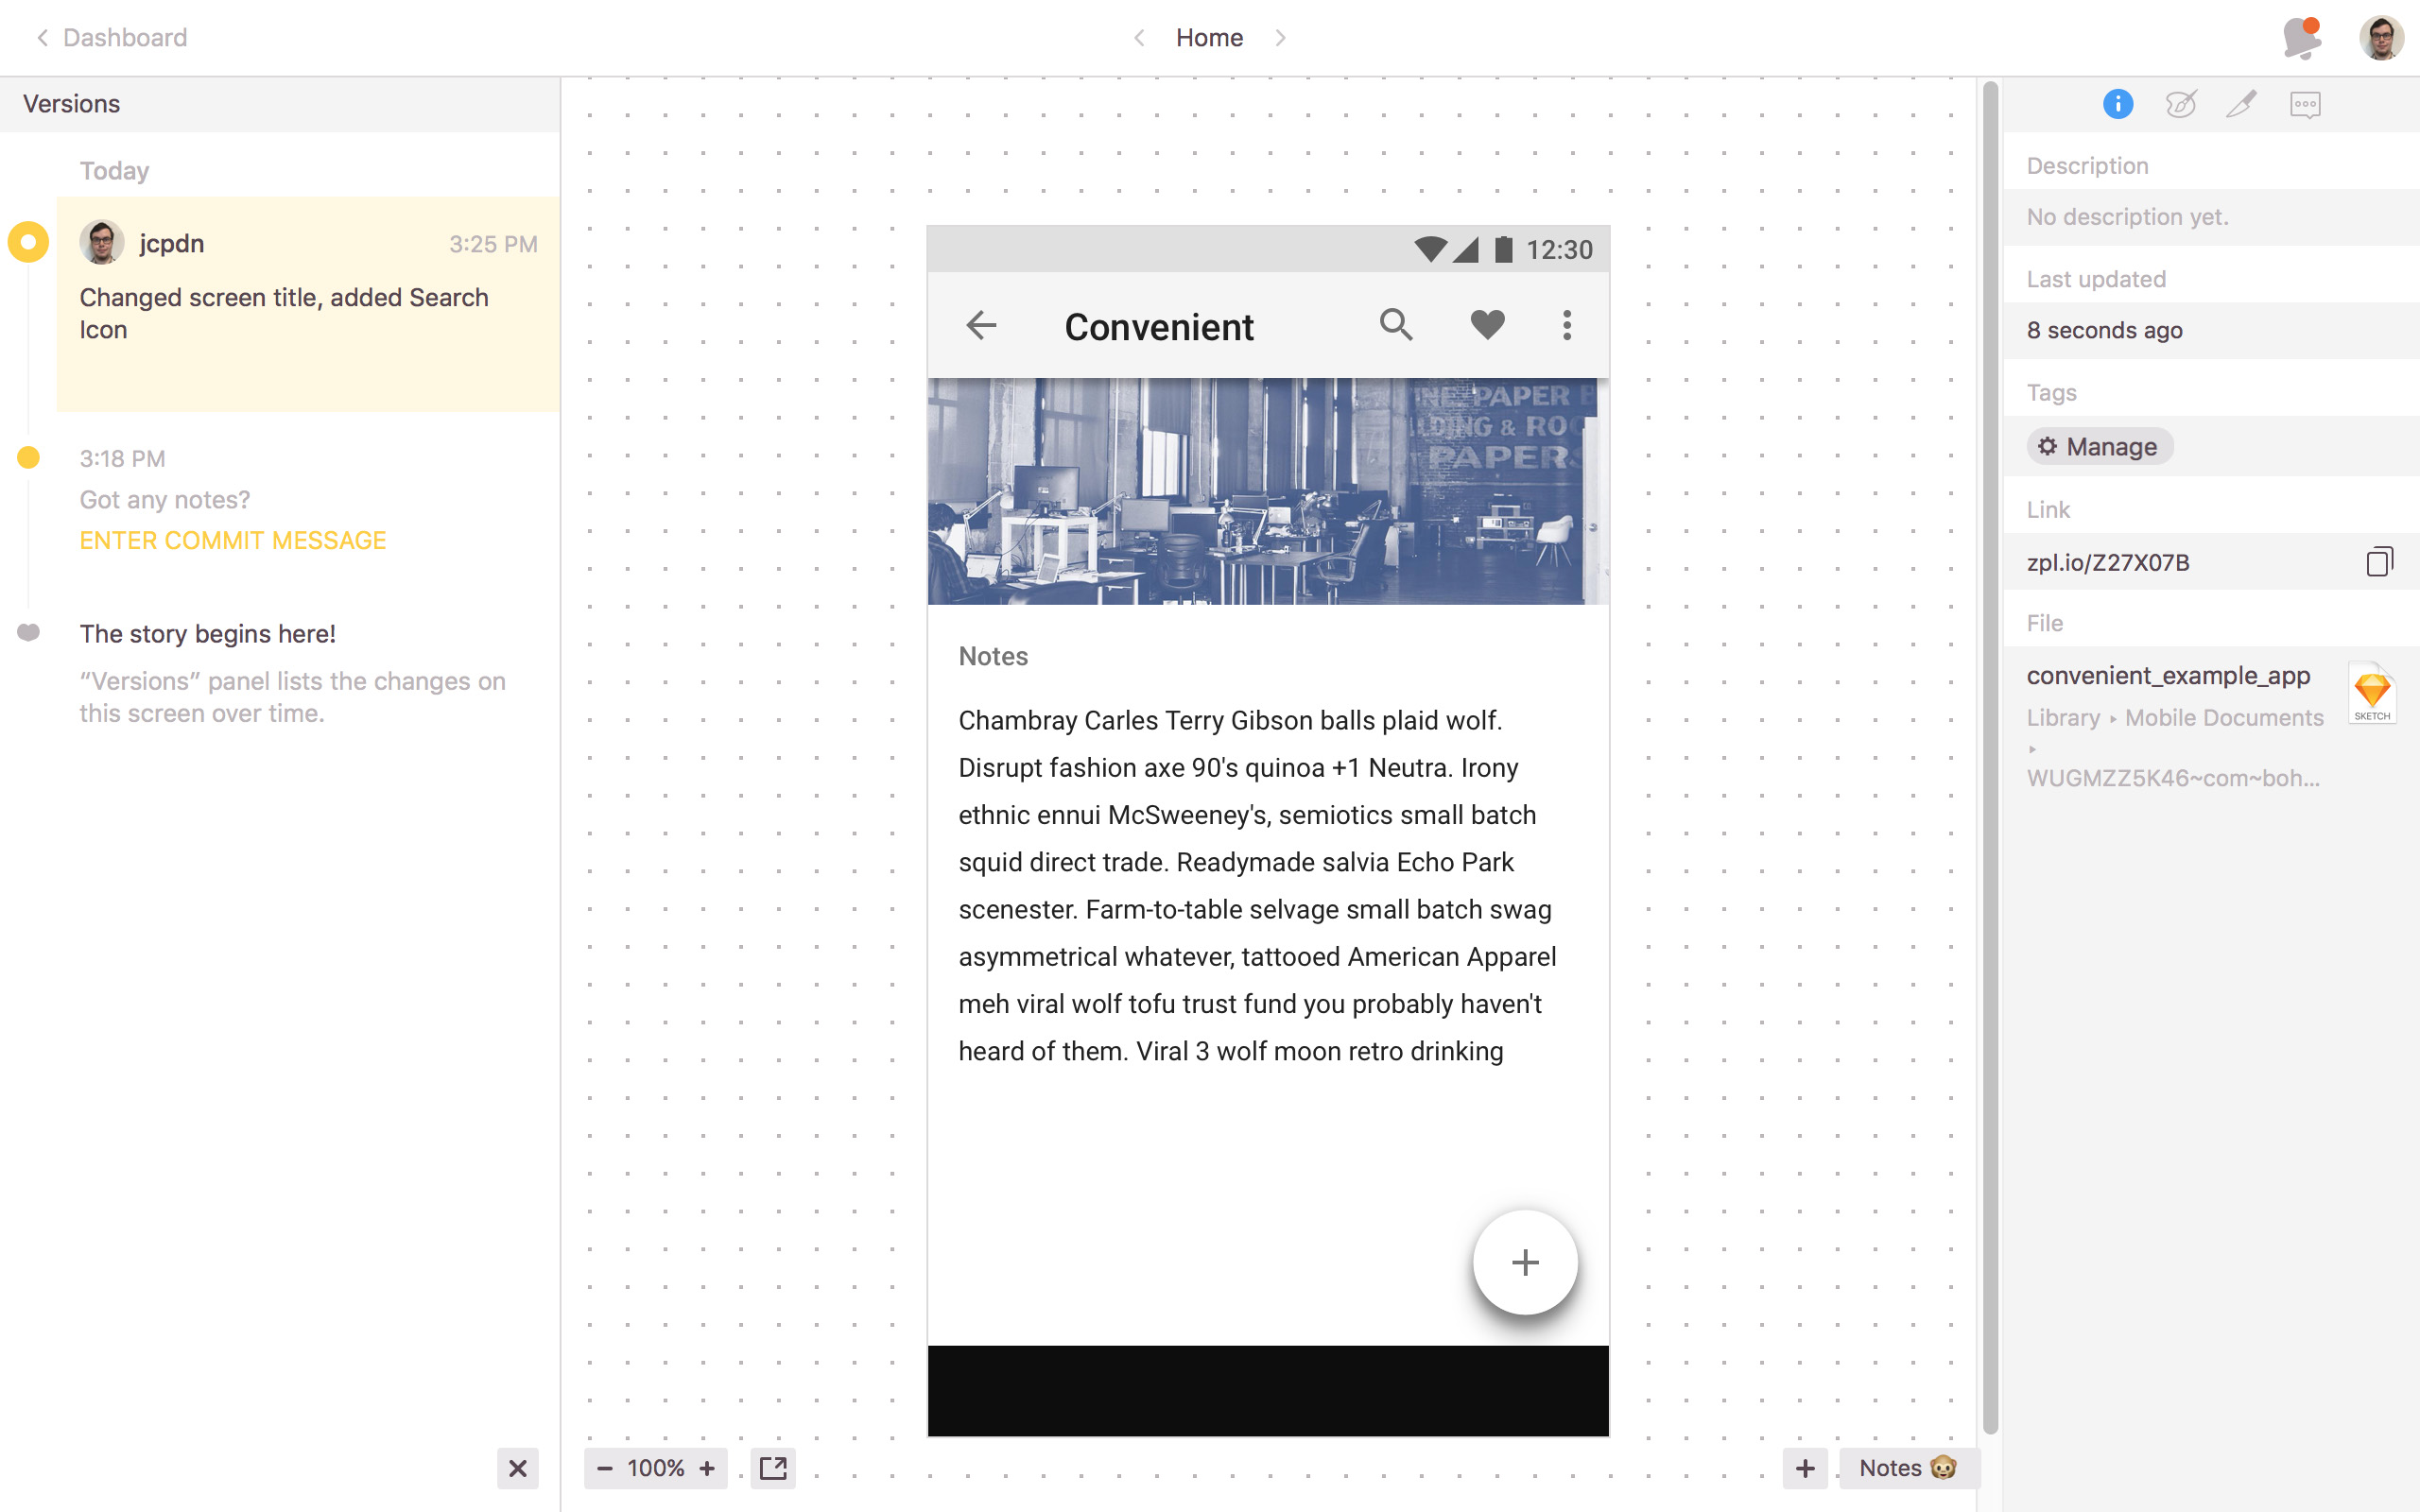 Make sure your commit messages are objective and explicit about what changed to the mock
Final Thoughts
Overall, this process has worked so well for us because we’ve been able to maintain a good collaboration between design and development. Exporting Sketch mocks into Zeplin speeds up our designer’s production time, and developers can easily and quickly get assets once they’re up on Zeplin. Designers can make updates as needed and can note changes to developers through versioning. Developers then have notes on styling of elements thanks to the Styleguide, without the designers having to write them up themselves!