OK maybe not. Deep down though I feel like it does, and it doesn’t take long to discover fun features with just a little poking around. Like many other iOS developers, I view Xcode as a friend that I’ve slowly grown more and more comfortable with as time progresses. When I first dipped my toes into Xcode it didn’t take me long to notice repetitions in my workflow that quickly grew monotonous. Clicking the same GUI items over and over each day, taking many of the same cumbersome steps to debug, writing the same boilerplate code, etc. As I’ve continued to work in the Xcode IDE, I’ve learned that many of these cumbersome steps really don’t have to be so cumbersome. Xcode can do a lot of cool things to autonomize workflow when explored just a tad underneath the surface. Below, I’ve outlined a small subset of Xcode goodies that I use on a regular basis.
Preferential Treatment
What good would any tip list be without diving into Preferences? Xcode Preferences may sound lame but there’s definitely some cool stuff going on. I’ll dive into only three of the settings.
Xcode Behaviors:
Most of the time I code solely on a 13” screen which means my visual real estate is valuable. I don’t particularly enjoy expanding and collapsing my navigator, debug, and utility area numerous times throughout the day to make room on my screen (not to mention the document outline). Usually I want some of these panes to show and other panes to hide depending on whether I’m developing or debugging. Toggling them in the GUI is repetitive, and even keyboard shortcuts achieving the same effect get tiresome when performed regularly. Enter Behaviors. Behaviors can automate a lot of this toggling for you!
Within Xcode > Preferences click the “Behaviors” tab

Here you can make Xcode change the GUI for a number of unique processes. Below, you can see that I have a behavior set to hide the utilities and editor pane when the build and run process begins, giving me an unobstructed view of the debugger. Also, I have a behavior set for when I stop running the app, where Xcode redisplays the utilities and editor pane and keeps the debugger open so I reference the logs.
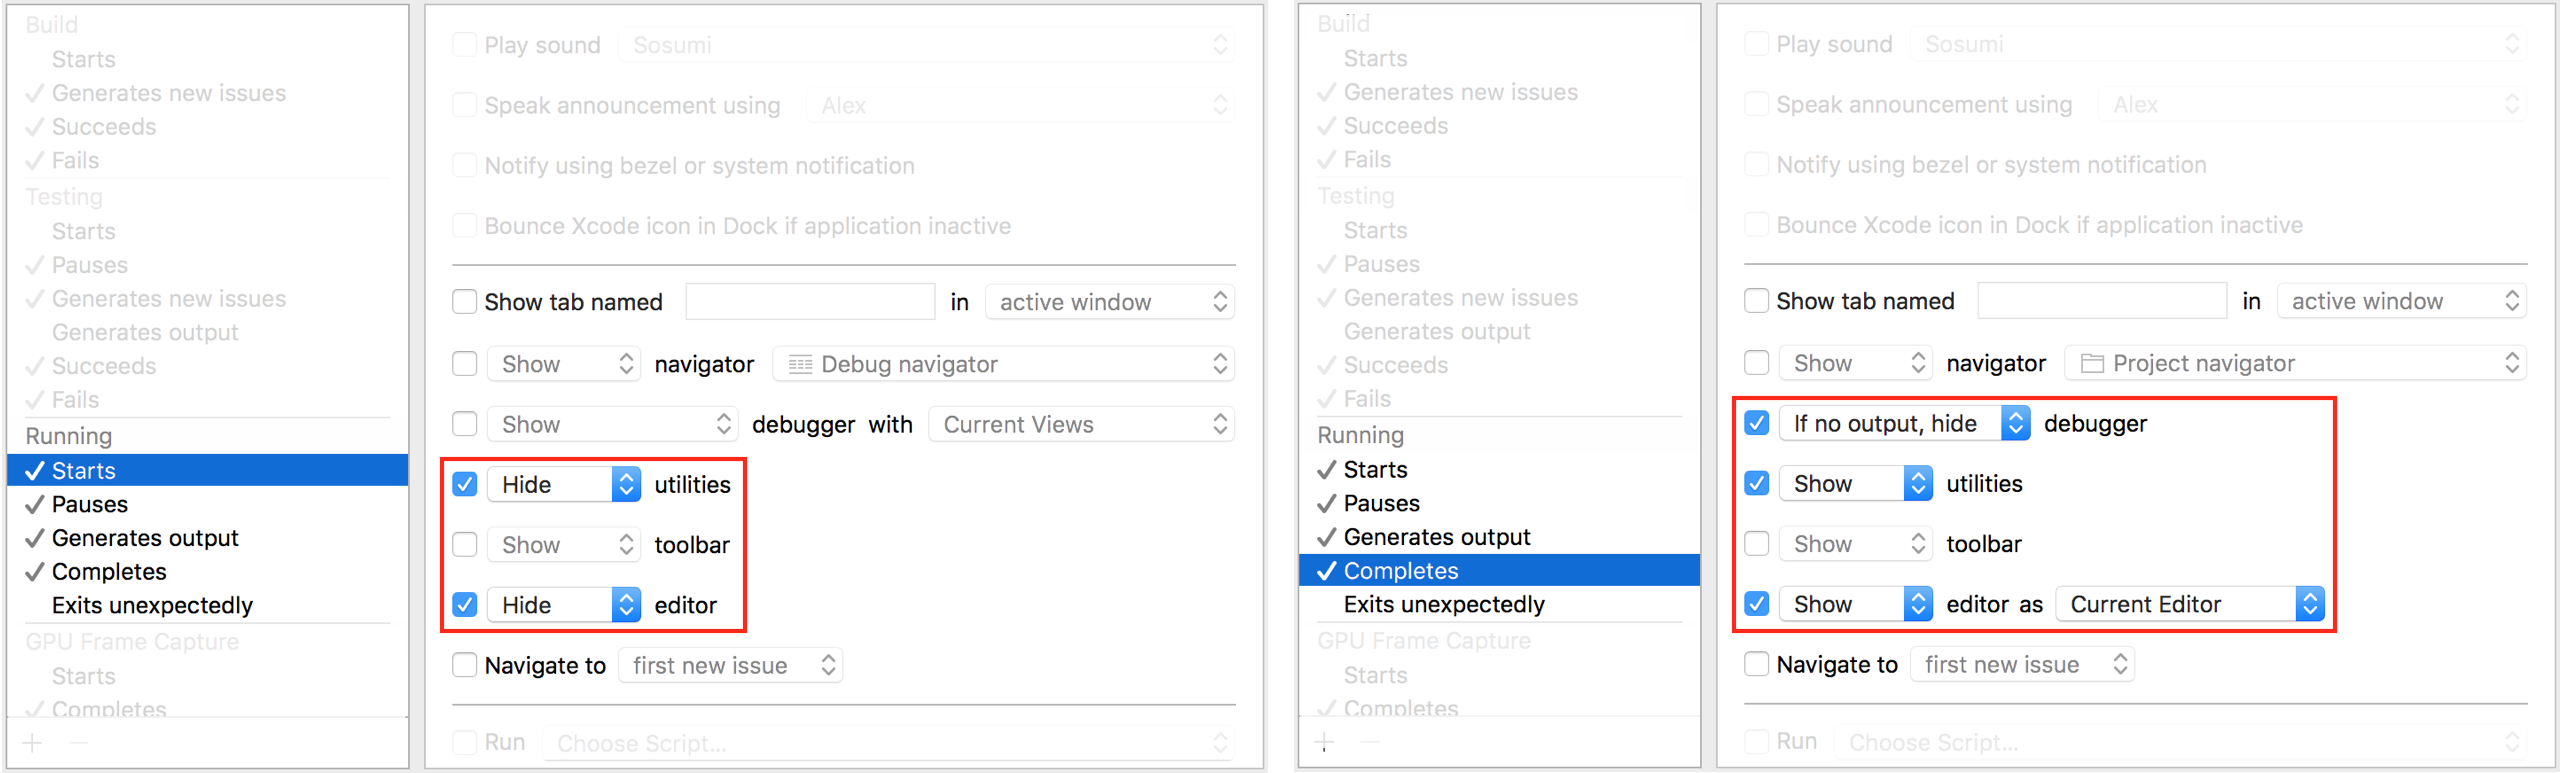
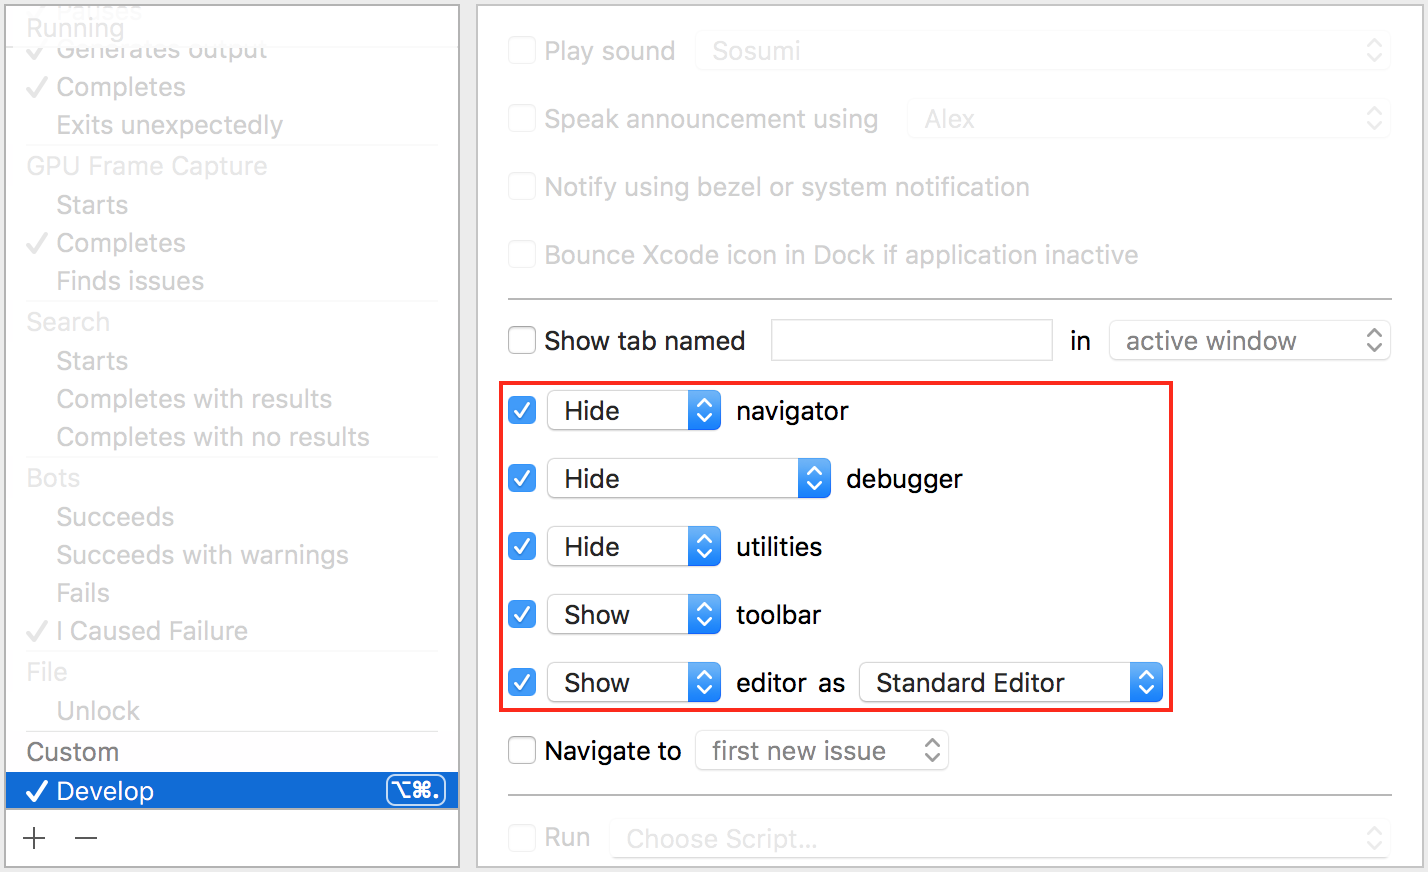
That’s not all. No no no. You can also create custom behaviors. For example, I created one and named it “Develop” for when I want to maximize my editor pane for development and minimize everything else. These custom behaviors have custom associated assigned keyboard shortcuts for your quick access pleasure.
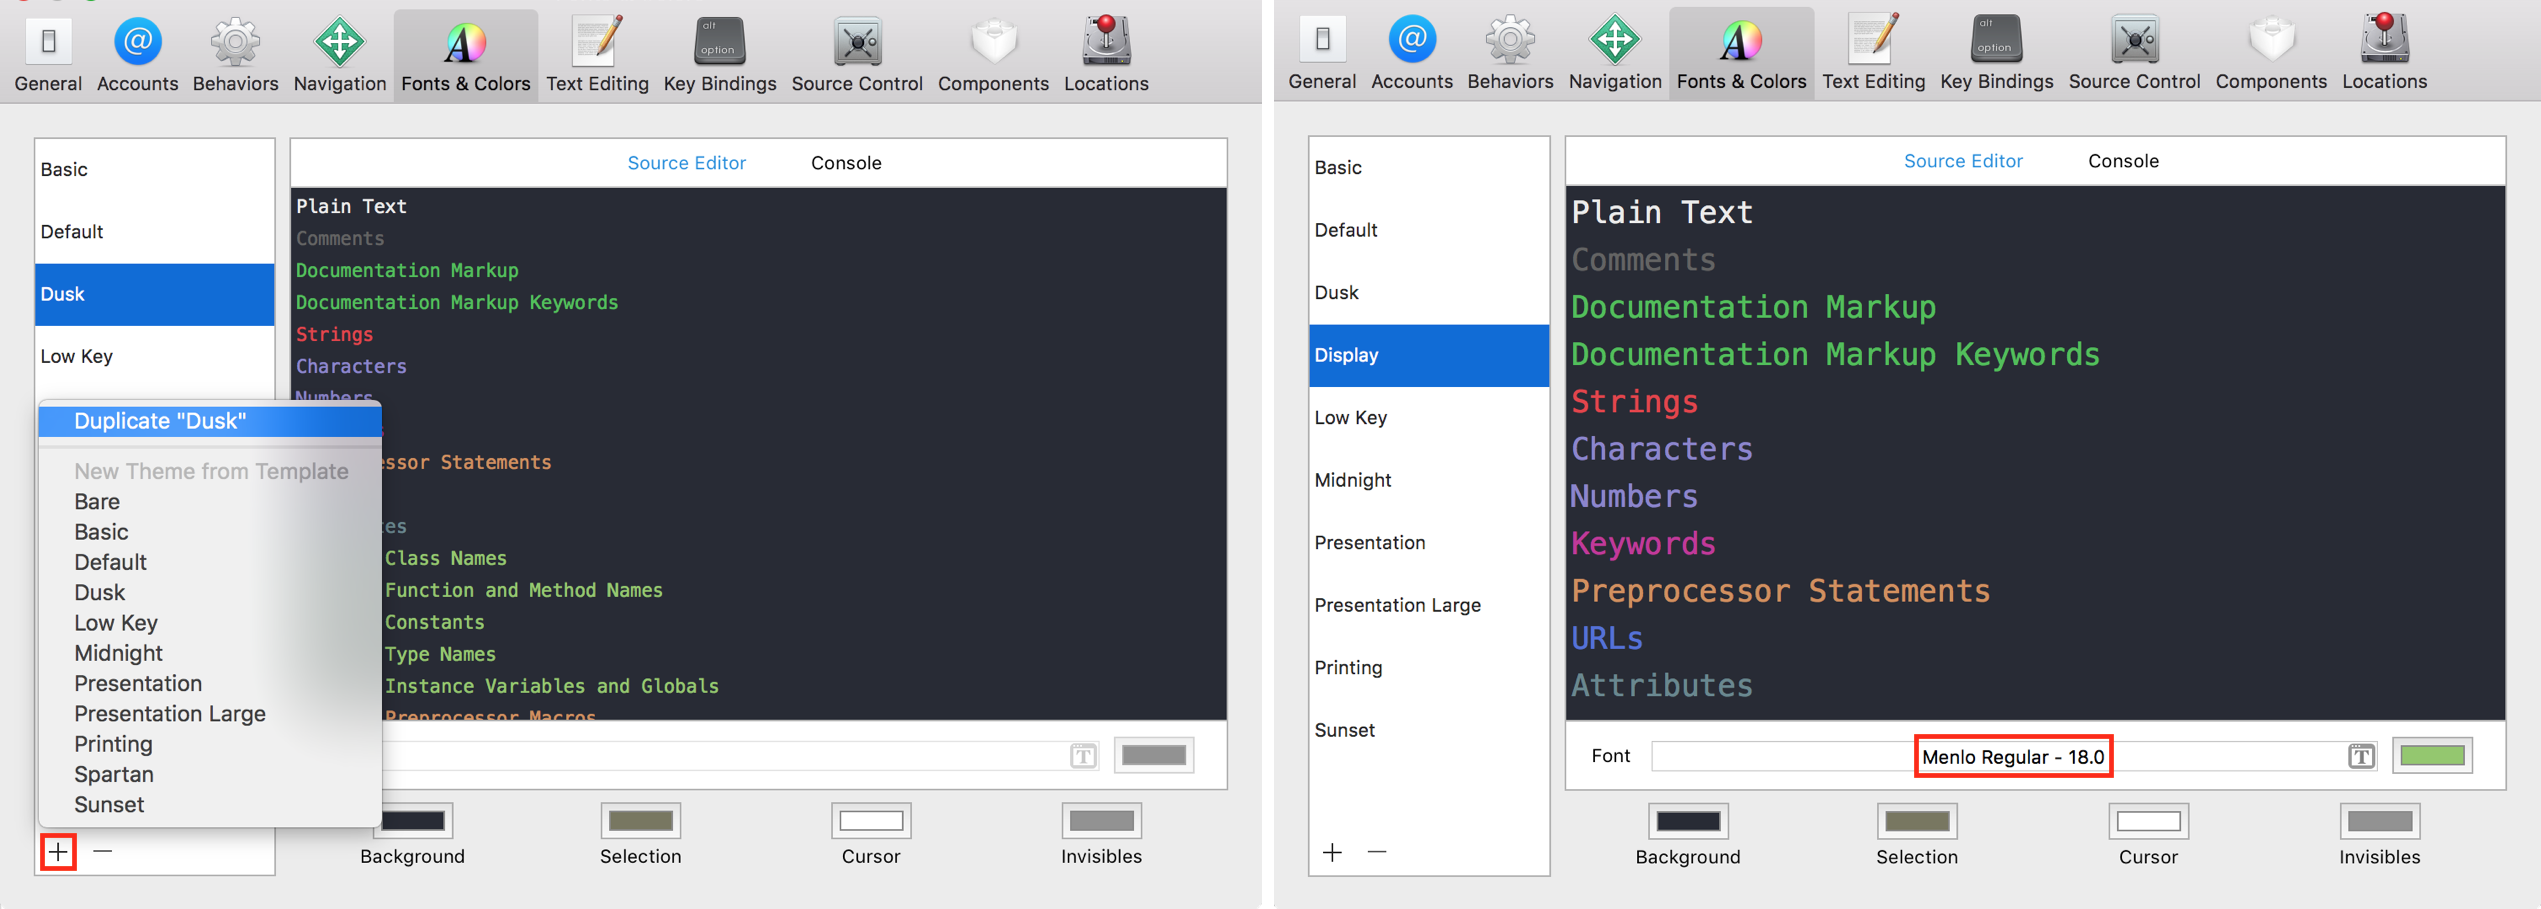
The 2nd Preferences item involves styling. In almost all cases of team code review sessions, it benefits everyone by connecting and displaying my laptop to a TV when I’m going over my code. The hiccup here is that whenever I connect to a large TV screen, everything displayed in Xcode looks tiny. Rather than fiddle with the styling of my Xcode fonts each time, I simply duplicated my styling preference of choice (“Dusk” of course), named it “Display” and increased the font size for everything. Now I have a quick way to toggle to a larger style when I connect to a TV. Hiccup be gone!
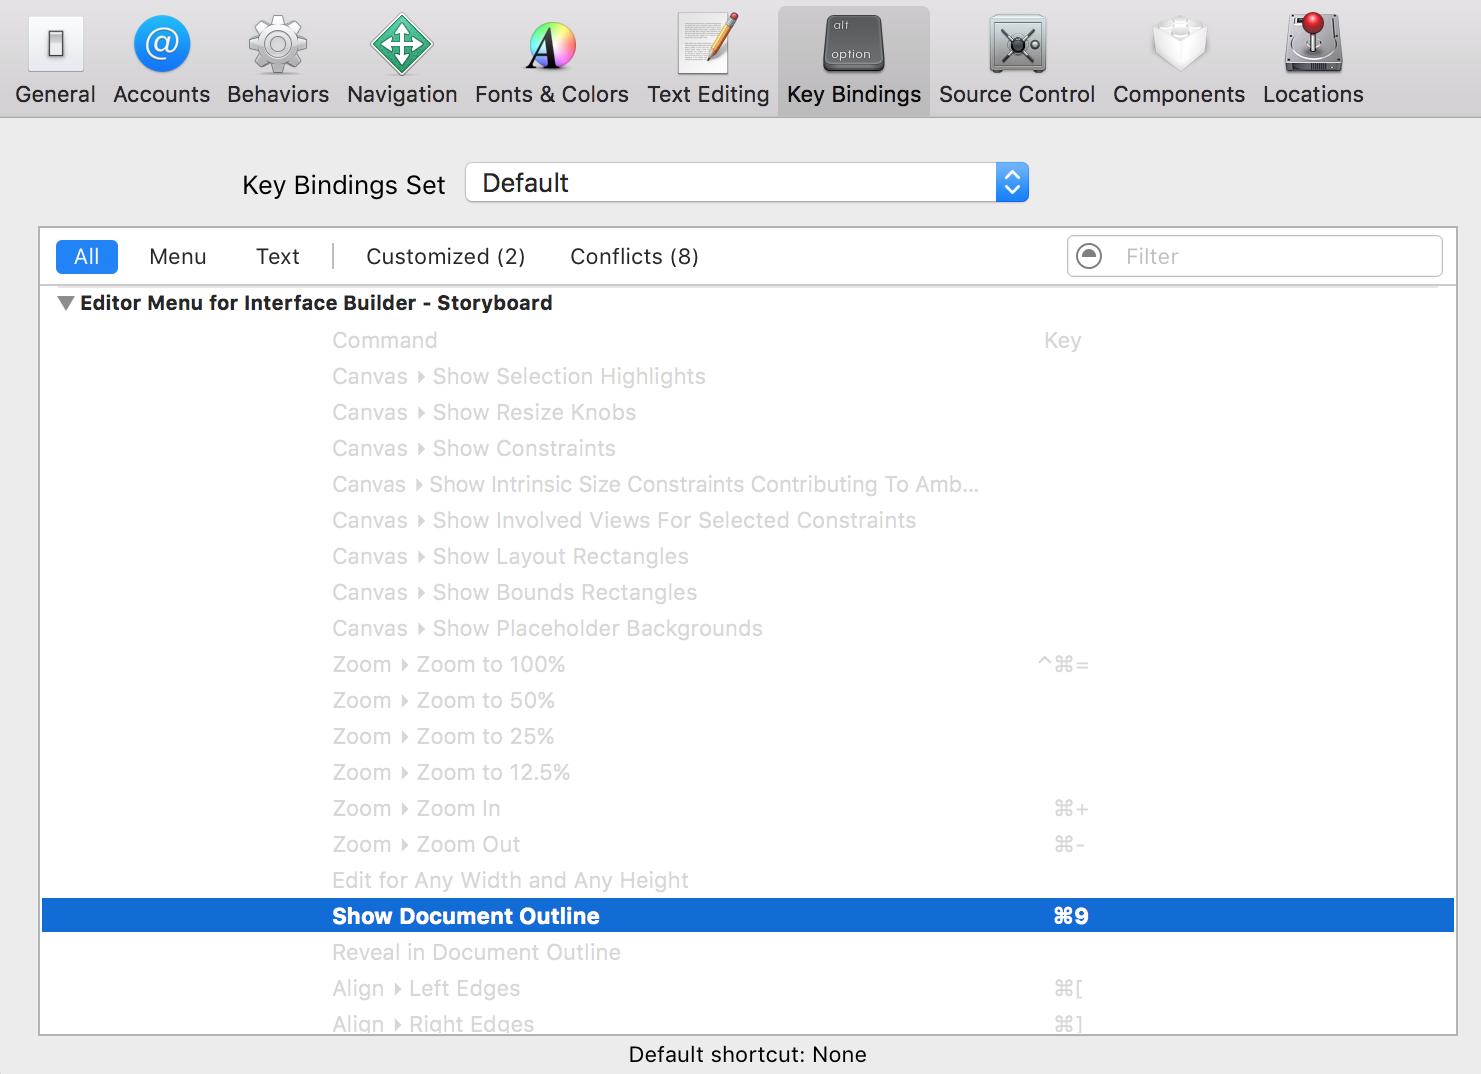
Keyboard wizardry is an ongoing goal of mine. Who doesn’t love keyboard shortcuts? Xcode has a daunting list of default key bindings that perform various actions but the list is not fully exhaustive. There are many actions intentionally left blank for you to decide your own keyboard shortcuts should you so choose. One such shortcut I love is to hide and show the Document Outline. If I can hide and show every other pane in Xcode with keyboard shortcuts, I didn’t want to leave the Document Outline out of all the fun. So, I gave it a shortcut ⌘9 which isn’t taken by any default bindings.
Trippin’ Through Scripts
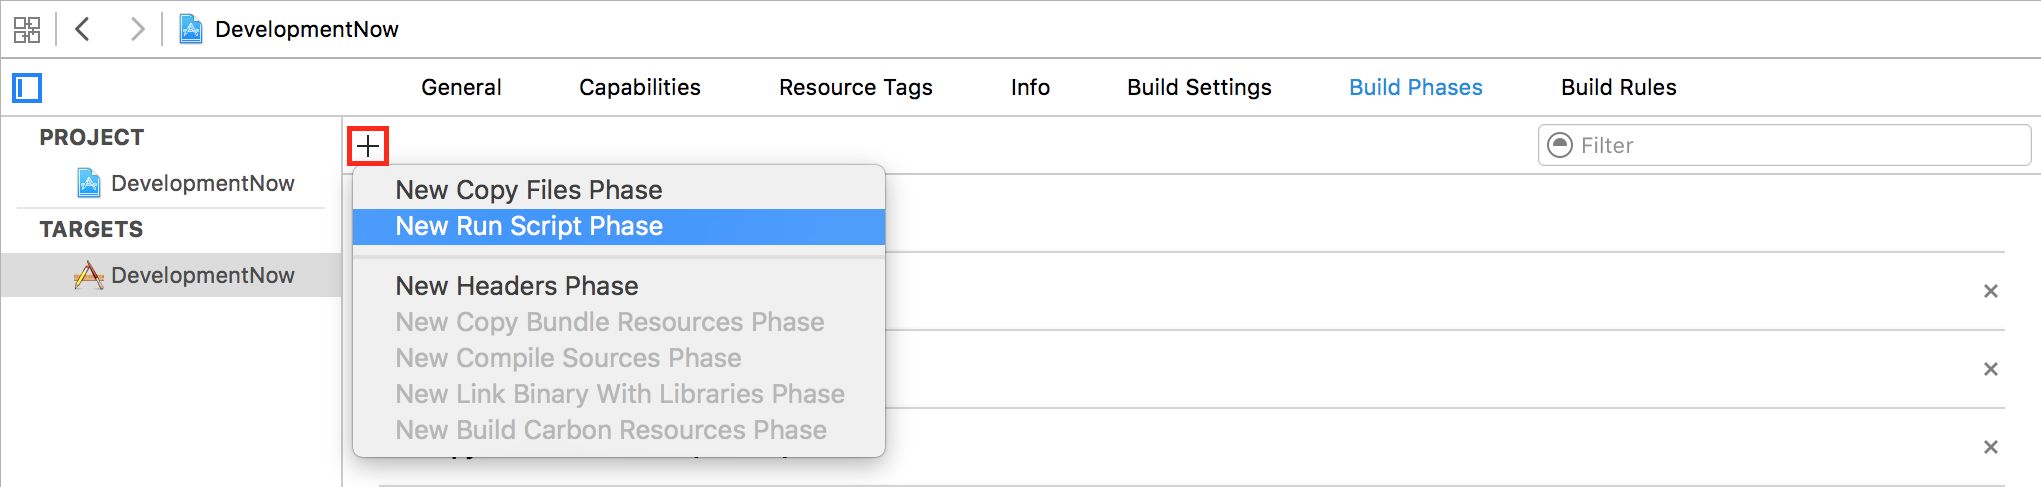
For far too long I ignored the little section in the project editor called “Build Phases”. The only time I ever ventured there was to link frameworks. They can do much more! One thing I love is being able to add custom runtime scripts during the build phase to do virtually anything I want, except for maybe making my breakfast. All you have to do is head over to your target’s settings and under build phases hit the plus icon.
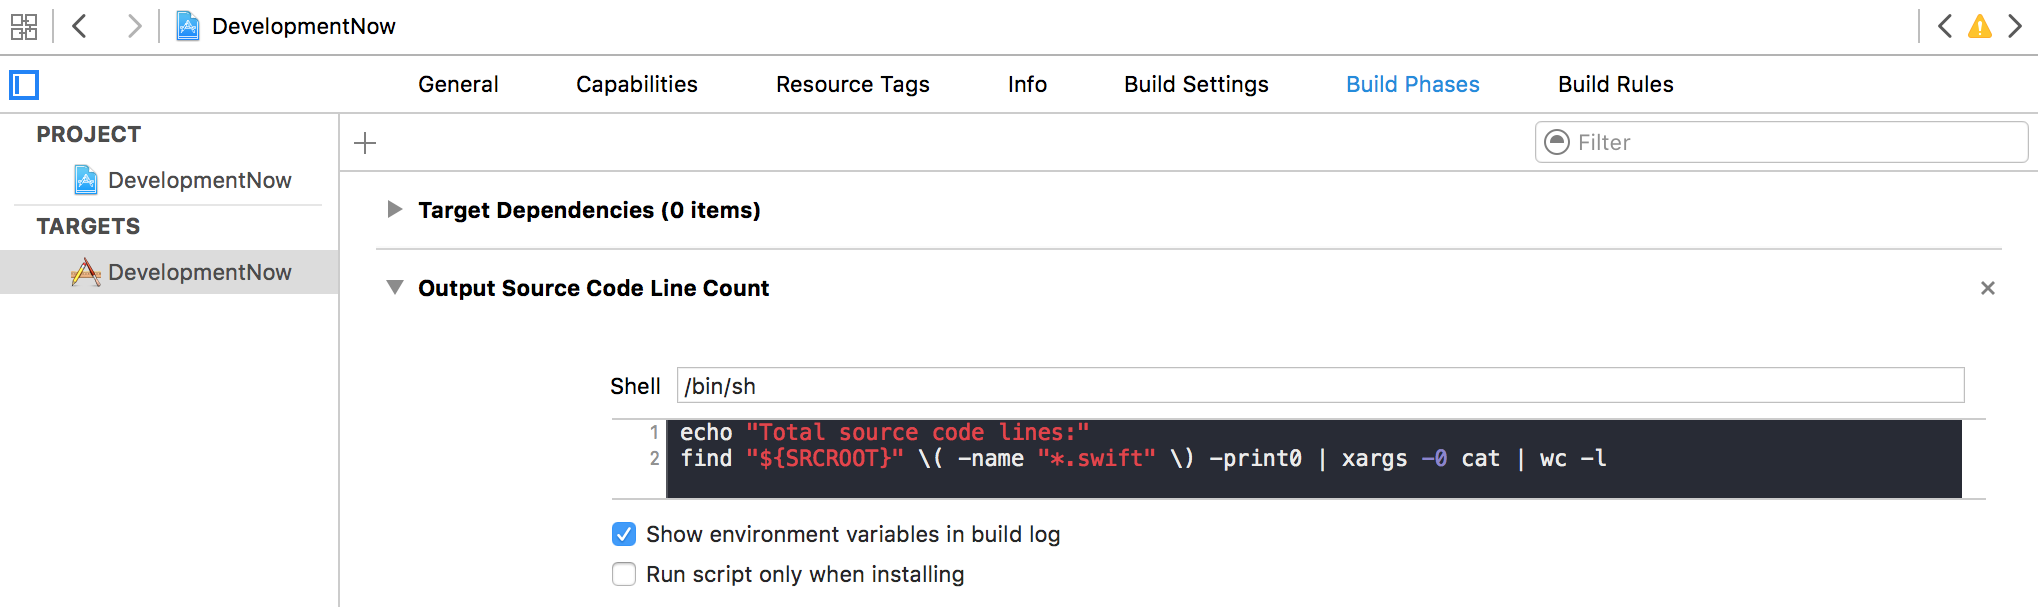
Here I’ve added a script and named it “Output Source Code Line Count” to tell me how many lines of Swift file source code my project has.
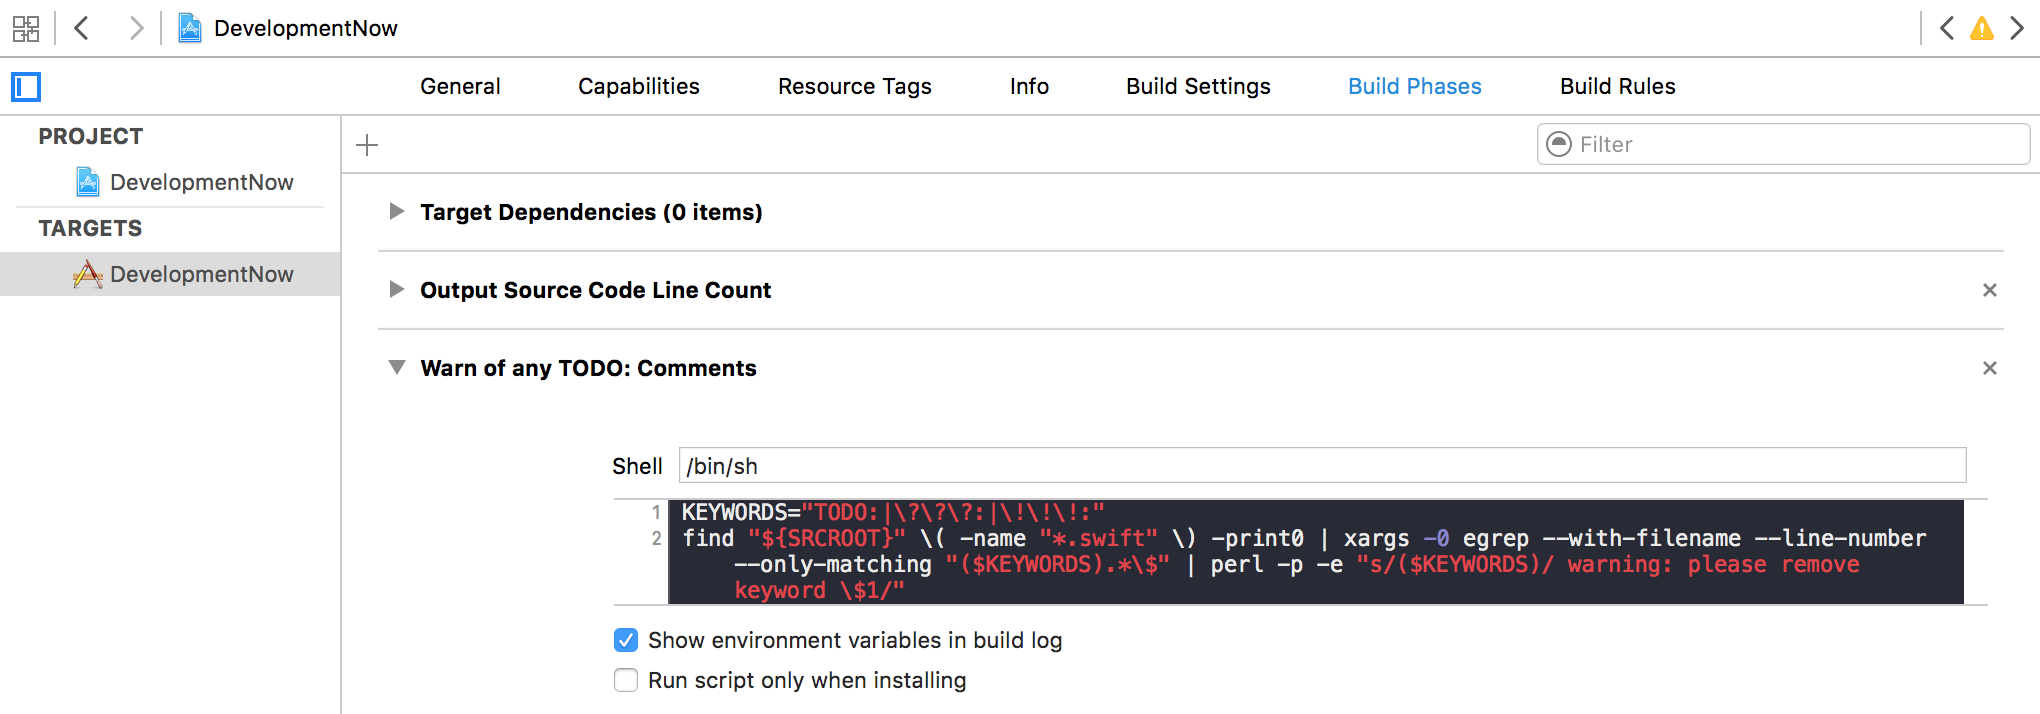
Here’s a slightly more useful script where I tell Xcode to spit out warnings for certain keywords to make sure I remove them when the time comes. In this case I’m warned of any “TODO:” comments that I’ve left in my code base so that I’m always aware.
Autocompleted Snippets FTW
If you haven’t noticed the underlying theme of this post by now, it’s that I’m lazy. Now I’m about to show you how I’m even lazier. Welcome to Operation: Code Snippet Library. Obscured it sits in the bottom right-hand corner of Xcode next to it’s shiny, more popular sibling the Object Library. The Code Snippet Library doesn’t quite have the glamour but it’s nonetheless useful in the right role. You may be thinking, “isn’t it easier to just write the code”? After all, you have to navigate to the library, sift through all the predefined snippets to find something useful, then drag it into the editor. Way too many steps! Well, that’s true. The keyword here is “predefined”. You can make, you guessed it, custom snippets! That’s not even the best part. Check it out.
Sometimes I write my `IBActions` by hand rather than using the classic click-drag from Interface Builder. Like anything else, it gets repetitive. Sounds like the perfect opportunity for a custom snippet! It’s super simple. Just type out the code you want to turn into a snippet, then highlight, click and drag it into the Snippet Library. Note, if you want your snippet to contain placeholder tokens use the <# #> delimiters. In the example below I placehold <#name#> and <#object#> parameters.
Once the snippet is all nestled and cozy inside the snippet library you can edit it. For me, I named the snippet “IBAction” and gave it, you guessed it again, a keyboard shortcut!
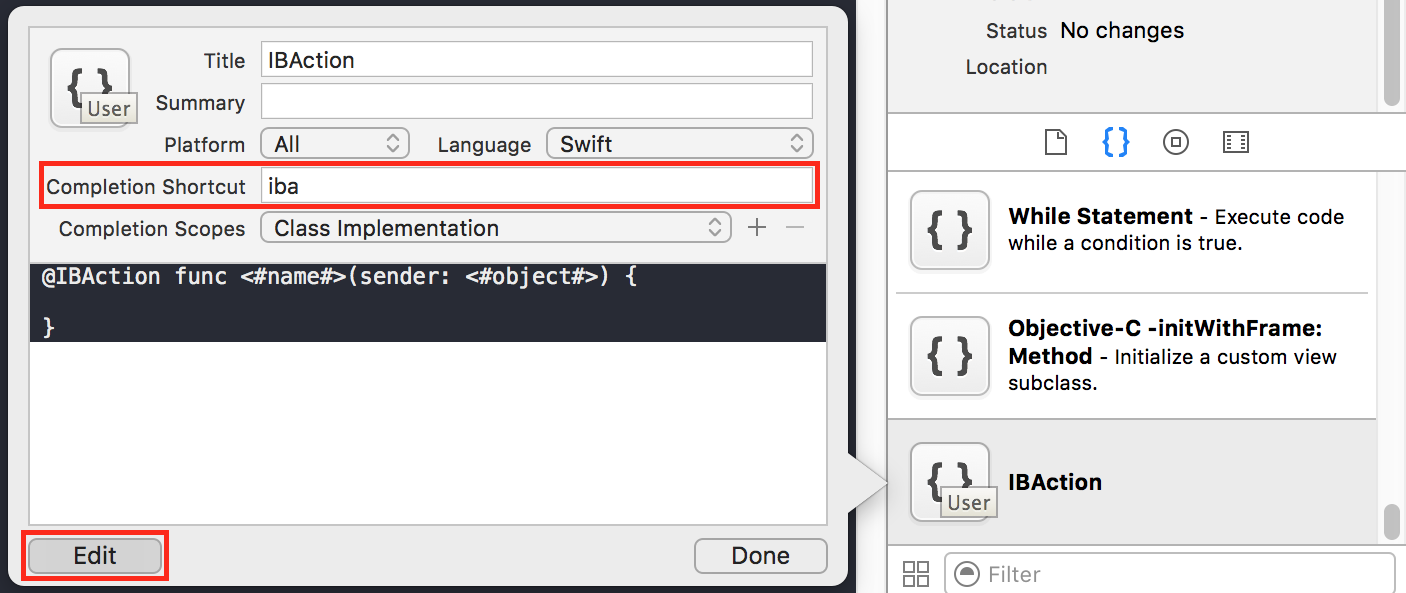
Now whenever I want to write an IBAction by hand, I can just type “iba” and I’m done. Laziness for the win!
Bonus: Derived Data Blaster
The Xcode equivalent of “Did you turn it off and on again?” is cleaning the project and/or clearing the Derived Data. Since I’m a natural at inducing issues that need Derived Data blasting, I love me some easy ways to clear said directory. Unfortunately finding this directory through Xcode is a painful process. You have to navigate to Xcode > Preferences > Locations > Find-and-click-the-extremely-small-grey-arrow-button-for-derived-data > and drag the directory into your trash. Gross.
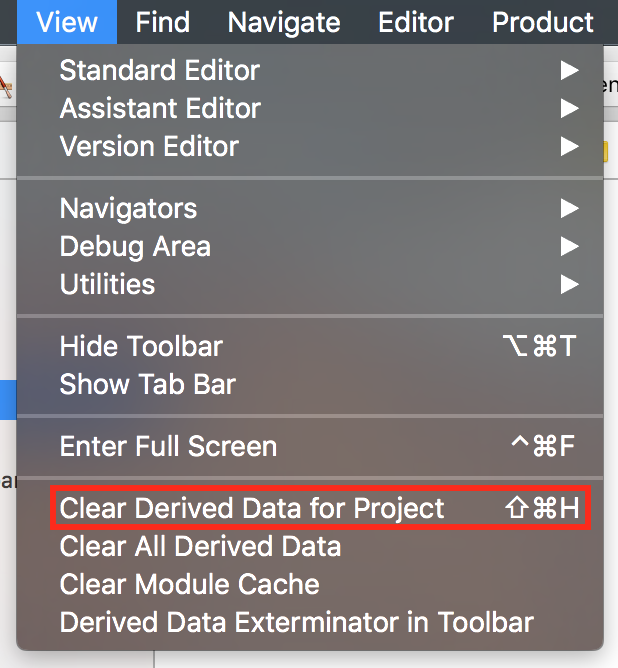
One way to expedite this process is to install a plugin that gives you a menu item and keyboard shortcut that deletes it for you. You could install the DerivedData Exterminator via the Xcode package manager Alcatraz and Voila! There’s your shiny new blaster button.
For those wary of installing 3rd party Xcode plugins, have no fear! You can just run a script. This is my favorite technique. Here’s a script that I put in my bash profile:
ddd() {

startingDir=$PWD

cd ~/Library/Developer/Xcode/DerivedData

numRemainingFiles=1

while [ $numRemainingFiles -gt 0 ]; do

rm -rf *

numRemainingFiles=`ls | wc -l`

done

echo Done

cd $startingDir

}
Now whenever I run “ddd” from the terminal (my alias for Demolish Derived Data), it’s all cleared out. Huzzah!
These are just a few things I’ve done to customize my Xcode environment to suit my needs. As you can see, there’s room for exploration. I hope some of these tips inspire you to discover little golden Xcode nuggets of your own. Now go forth and conquer!