At DevelopmentNow, we are always looking to explore emerging technologies. So, naturally, Virtual Reality (VR) piques our interest. There are numerous platforms where you can get started with VR. I choose Unity because it has some of the most robust support for VR out there and because I had prior Unity experience. Luckily for me, they had a great sample VR app and tutorial on their site. So, I dove right in and started experimenting with it. I want to share the modifications and things I learned in the process with you in this blog. Hopefully, you can follow along and explore the exciting world of VR with me.
If you’ve never worked in Unity before, I recommend watching the Roll-a-Ball tutorial. It’ll teach you the basic things you need to know in order to build a game in Unity. If you have some Unity experience you can go straight to their VR tutorial and download the sample app.


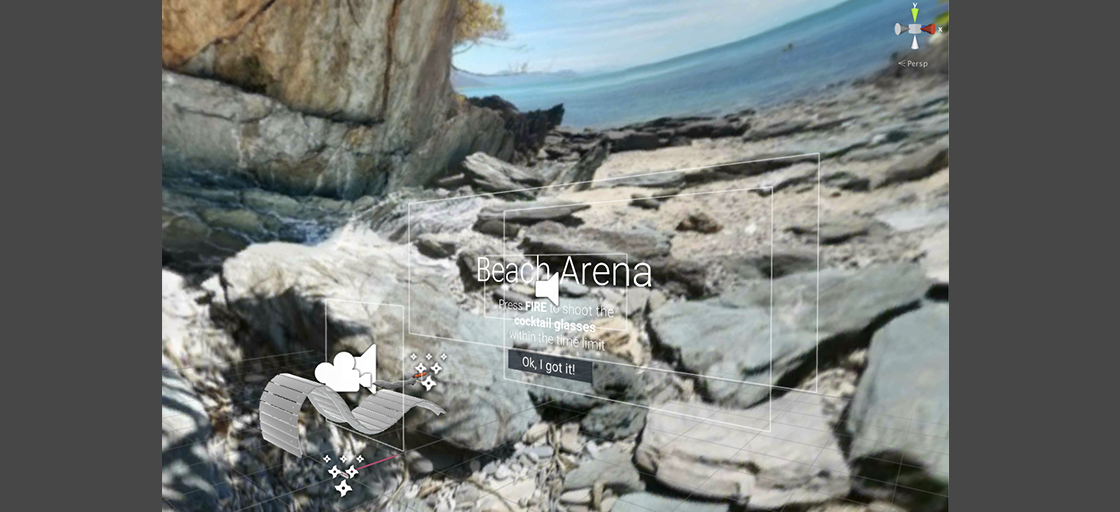
Goodbye gray pumpkin. Hello beach! I thought modifying the background GameObject would be pretty simple. It was at first; I deleted the original gray background GameObject from the scene and replaced it with the basic Unity Sphere GameObject. So far so good. Following that, I did a google search for “Beach Photosphere” (or something similar) and found a 2:1 aspect ratio image that I liked.
Things got tricky after adding a material to the GameObject and attempting to add this beach texture (a texture is just a bitmap image like a jpg). The image appeared on the outside of the sphere instead of on the inside which means the viewer, whose viewpoint is inside the sphere, sees plain gray instead of the beach. I needed the texture to wrap on the inside of the sphere.
A little research informed me that I needed a custom shader to invert the image. How to make a 360º image viewer with Unity3D and Full 360° stereoscopic video playback in Unity helped me get the texture placed correctly. (I ended up using a beach image from the first blog because I liked it better than the one I originally found). It was time to make more changes.
The “fence” GameObject didn’t really make sense in the new beach scene, and I wanted to learn how to add 3D models in VR.

One youtube video later, I had an idea how to add 3D models. Turns out all you need to do is add a .fbx to your assets and drag it into the scene. The video also lead me to TF3DM, a site where you can download 3D models for free (for personal use). I replaced the fence with a beach chair along with other small modifications:
Although adding 3D models was simple, the idea of creating 3D models was daunting because I had no experience in this area. But, it seemed like a fun challenge so I began researching.
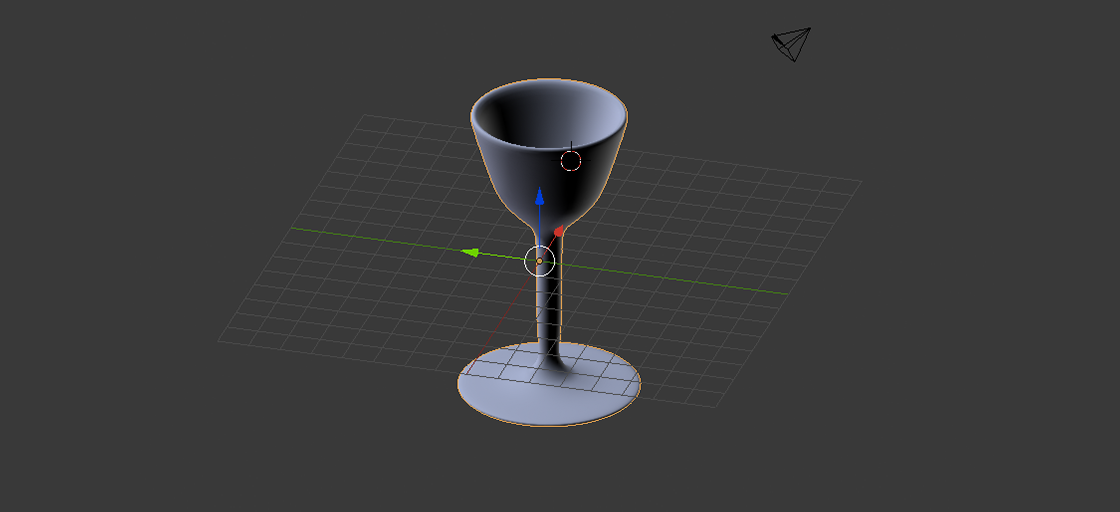
That’s when I learned of Blender: a popular, free, open-source 3D modeling program. With the help of Blender’s Introduction for Beginners tutorial and this awesome youtube tutorial on making “goblets” in Blender, I created my first 3D model:
My goal with this model was to use it to replace the targets in the original game. The targets have a regular and shattered variation:

This meant I needed a regular cocktail glass and a shattered cocktail glass so the glass shattered when shot. Another awesome youtube video showed me exactly how to accomplish this. With the regular and shattered targets finished, I imported them into Unity:

In the Unity Shooter 360° game, the target is a Prefab asset type. For a description of Prefabs check out Unity’s documentation. You can replace a Prefab’s base GameObject by dragging the new GameObject onto the Prefab.
When I did this, all the components (things like the shatter audio and scripts) attached to the Prefab disappeared. I attempted to put the prefab back together in vain and I never got it to quite work the way it did originally. (If you’re following this tutorial maybe you’ll have better luck!) Nonetheless, improvisation and tweaks did lead to a shatter effect that was very similar to that of the original game.
Here is a look at what the game looks the after all of the changes:
Playing with the Unity VR Samples app allowed me to get familiar with many fundamental components of VR development, and I think it’s a great start for anyone looking to get started with VR development. Since this beach project, I’ve expanded the VR samples app even further adding by adding my own scenes and interactions instead of modifying existing ones. There are many exciting things on the horizon for VR and Unity like 360° video support and EditorVR. I found EditorVR truly transformative and I’m eager to start experimenting with it and experiencing more of what VR has to ofter in the future.